

This one from Desert Ordnance is my inspiration.


First step is to remove the old finish, I need to get down to bare wood so we can stain it neon green. I coated the stock in Citristrip and let it sit for an hour.

Here it is after scraping and cleaning with acetone, there is still some residual finish, I may need another swabbing of Citristrip

This chunk missing behind the receiver well is why I chose this stock, I am going to paint the stock black, so I can fill this in with body filler or epoxy

Another round of citristrip and scraping and it is 95% clean, sandpaper will take care of the rest


I then mixed up some two part epoxy and mixed it with sawdust

and filled in the gouge

I wanted to put some bio-hazard symbols on the stock, so I traced one onto the butt stock, these are going to be filled with epoxy laced with photo-luminescent paint

and started removing wood.


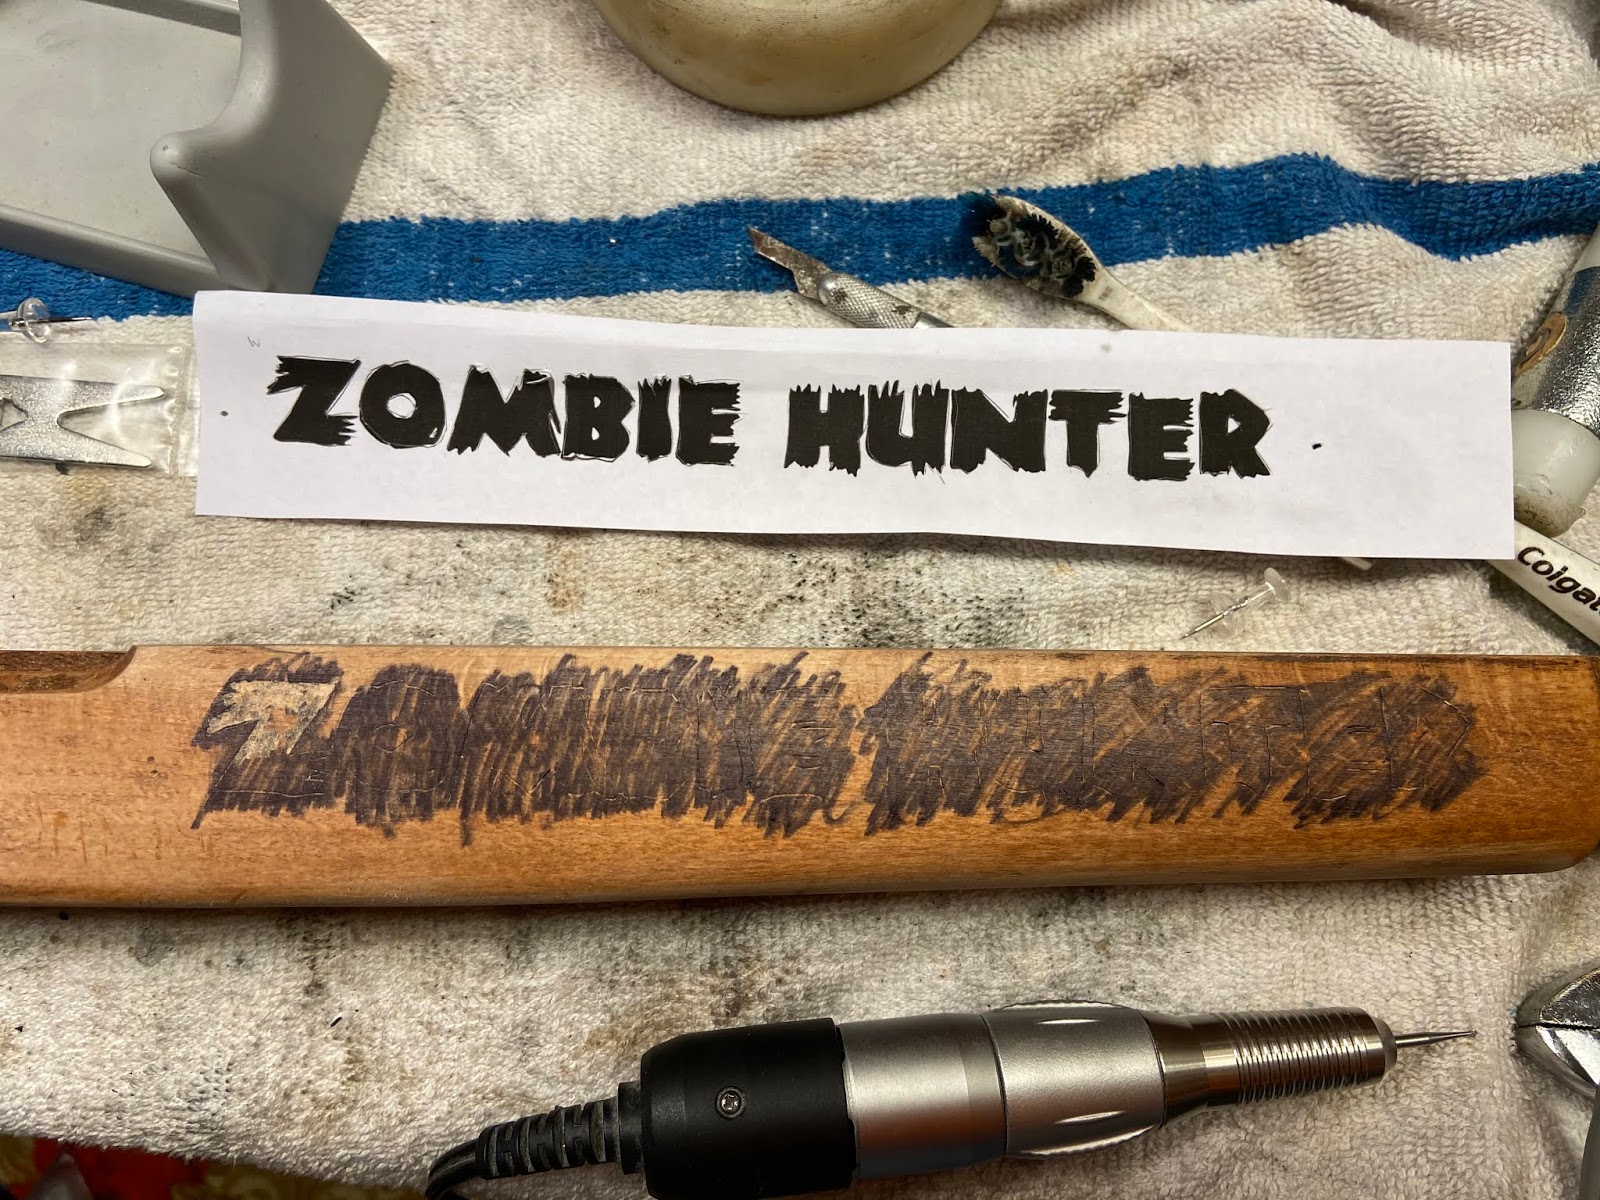
Then I started on the "Zombie Hunter" text on the fore end. I printed out the letters from my computer and tacked it in place, then traced them with a fine exacto knife

Then I used my rotary tool to remove the wood

Then I deepened the recesses

Then I did the same on the other side

I also added the requisite hash mark count

Time to mix up the Bob Smith two part epoxy and the Techniglow luminescent paint


After curing overnight the epoxy did not glow in the dark (and yes I exposed it to light before putting in the dark). The paint must have been diluted too much to glow. I will have to paint it on the top of the epoxy or maybe remove the epoxy and start over. Here is a picture proving the paint does glow in the dark....

Here is what it looks like after the epoxy cured and I sanded it flush


For the other side I decided to try a different approach, paint the recesses first, then cover with epoxy.

So far so good, you can eve see where I wiped my fingers on the towel.

This process worked, here it is after the epoxy was used to fill in the painted voids...


After a couple of coats of paint, another round of epoxy, then I begin sanding the epoxy down so only the stuff in the recesses remain....also I fit the butt plate at this time.


In Part 2 we will finish sanding and begin staining the wood Zombie Green....

The parts needed for this build were already in my inventory, they include:
A Kingston Armory parkerized steel receiver

an aftermarket no name parkerized bolt

a factory plastic trigger housing and hodge-podge of parts

The stock is just a run of the mill beech wood factory stock from my collection of 10/22 stocks.
First step is to remove the old finish, I need to get down to bare wood so we can stain it neon green. I coated the stock in Citristrip and let it sit for an hour.

Here it is after scraping and cleaning with acetone, there is still some residual finish, I may need another swabbing of Citristrip

This chunk missing behind the receiver well is why I chose this stock, I am going to paint the stock black, so I can fill this in with body filler or epoxy

Another round of citristrip and scraping and it is 95% clean, sandpaper will take care of the rest


I then mixed up some two part epoxy and mixed it with sawdust

and filled in the gouge

I wanted to put some bio-hazard symbols on the stock, so I traced one onto the butt stock, these are going to be filled with epoxy laced with photo-luminescent paint

and started removing wood.


Then I started on the "Zombie Hunter" text on the fore end. I printed out the letters from my computer and tacked it in place, then traced them with a fine exacto knife
Then I used my rotary tool to remove the wood

Then I deepened the recesses

Then I did the same on the other side

I also added the requisite hash mark count

Time to mix up the Bob Smith two part epoxy and the Techniglow luminescent paint


After curing overnight the epoxy did not glow in the dark (and yes I exposed it to light before putting in the dark). The paint must have been diluted too much to glow. I will have to paint it on the top of the epoxy or maybe remove the epoxy and start over. Here is a picture proving the paint does glow in the dark....

Here is what it looks like after the epoxy cured and I sanded it flush


So far so good, you can eve see where I wiped my fingers on the towel.

This process worked, here it is after the epoxy was used to fill in the painted voids...

and after the lights are turned off...the object on the upper left of the photo is the bottle of paint

So now I needed to remove the epoxy from the other side, repaint with the glow in the dark paint and reapply the epoxy, then sand and dye the stock


After a couple of coats of paint, another round of epoxy, then I begin sanding the epoxy down so only the stuff in the recesses remain....also I fit the butt plate at this time.


No comments:
Post a Comment