Sunday, August 30, 2020

Ruger 10/22 Finger Groove Sporter Tribute Part 4

If you missed the previous posts of this build, click on the links below

Part 1
Part 2
Part 3

The wood is ready and the barrel and receiver have been blued, time to assemble this bad boy


First we install the sights on the barrel, one trick I learned was to use a pencil to cover the edge of the sight with graphite, before using a brass punch to drive the sight on, this prevents leaving any marks on the sight.....and yes I know I put the sight on backwards....I fixed it after I took the picture.....


Then install the barrel onto the receiver


Then goes in the polished aftermarket bolt, the reblued charging handle and my own home made bolt buffer


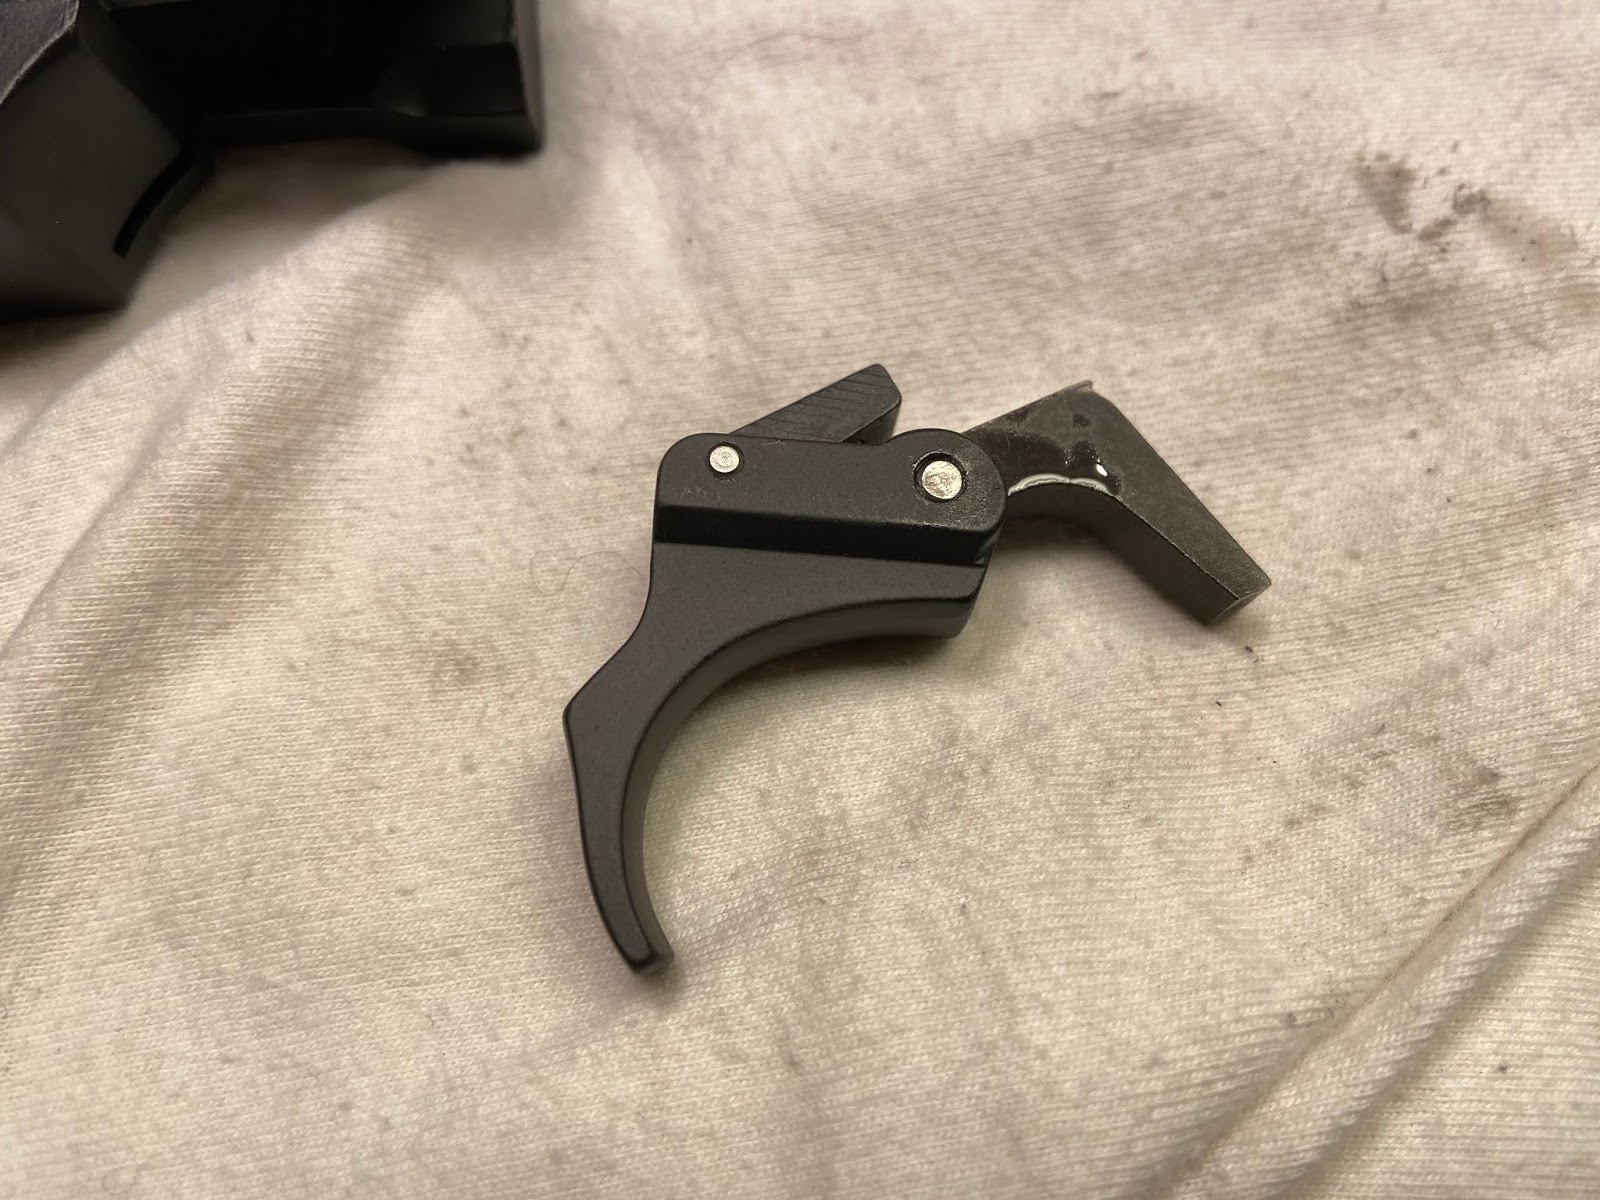
Then goes on the trigger assembly, using some aftermarket pins that I sell.


Finishing touches, I had to install the plugs for the scope rail


We use a custom take down screw made by yours truly (see how I made it here).


Then a coat of wax 


Finished!


A couple of before and after shots


Costs for the project

Modified stock: $0
Grip Cap: $1.00
Cerakote work: $50.00
Sling Swivels: $2.00
Kingston Armory Receiver: $55.00
Used Factory Barrel: $0
Aftermarket polished bolt: $7.50
Trigger housing and parts: $0
Misc parts: $12.00

Total: $127.50


On to the next project......

Wednesday, August 26, 2020

Interesting Firearm Photos XXXXIII


This should get some looks from the neighborhood busybodies.....


Corporal M Smith of the Duke of Cornwall`s light infantry posing with his Thompson outside the British 8th army`s headquarters, San Angelo area, 1943


Famous author Mark Twain (Samuel Clemens) shoots at turtles in his pond with his Colt model 1903. Circa 1908.


August 18, 1961 - East German border troops guard an unfinished section of the Berlin wall


Don't fuck with the Queen Mum.....


Once upon a time, the .44 Magnum had not yet been born.....


The 14.9mm SOP uses a 1,690 grain, .58 cal bullet that generates 42,000 pounds of force at the muzzle. It is designed to take out targets at 5,400 meters (over 3 miles).


The pictures posted above were found on the World Wide Web, they are being used for entertainment purposes of the Fair Use Doctrine of Section 107 of Title 17 of the U.S. Code. If you own copyright to any of the images and would like them credited or removed, please contact me through the blog.


Saturday, August 22, 2020

Ruger 10/22 Finger Groove Sporter Tribute Part 3

If you missed the first two parts click on the links below

Part 1
Part 2


When we left off we had finished up the sling swivels, now it's time to get back to filling the grain and applying the finish. After the hand rubbed initial coat has cured for 24 hours or more, I apply some oil then sand with 600 grit paper, using the oil as a lubricant I create slurry of sanding dust and oil, I then rub the slurry into the grain working it in all directions until almost dry, then move on to another spot on the stock.
On the next application I will use 800 grit, then 1200


Third coat sanded in


Now we start on some of the metal pieces

I cleaned up the old Mauser sling mount


I removed the butt plate, which I will bead blast and cerakote, but first I clean up the screws for bluing


While I was at it I cleaned up this vintage charging handle


Here are the parts after bluing


I also blued the grip cap screws....they look much better in black than zinc (zinc on right, blued on the left)


Next I install the rear sling swivel


Followed by the front swivel base, I had to trim the screws to make sure they wouldn't hit the barrel


Then I attempted to install the front sling loop.....and I didn't leave enough clearance....I'll tend to this problem later


I sent the parts off to have them Cerakoted, I am still not sure if I want to get set up to apply Cerakote, after seeing the results I am seriously considering it


I also installed the newly Cerakoted butt plate


Next I began assembling the trigger assembly, I am using a factory aluminum unit as a donor, I got it for free because someone broke the trigger guard


First to go in is the safety, I built this special tool (a pencil with a hole drilled in it) to make it easy.


Put the tool in the safety slot, line it up with the spring/plunger hole and insert the spring and plunger, then use a punch to push them down into their recess and slowly move the pencil to the side to trap the spring and plunger. Then follow the pencil with the safety, making sure to have the detent side down and the fire indicator to the left


Next I move to the trigger/sear assembly, the sear needed to be cleaned up, this is where the hammer rides against it


polished like a mirror


to assemble them I use a special slave pin, it holds the sub-assembly together to ease installation. Once in place the trigger pivot pin pushes the slave out of the housing to be re-used on another installation


The hammer strut is new, the donor assembly was missing it


I polished the end where it interfaces with the hammer


Then I move to the hammer, it is hard to believe that the one place on a 10/22 that needs polishing, looks the worst.


I polished the sides where the bushings ride 


Then began stoning the hammer


After stoning and polishing


Assembled, ready to rock


Next we tackle the barrel. I had plenty of spare barrels to choose from. This one looked bad on the outside, but minty fresh on the inside.  Since I had to blue some parts anyway, I may as well clean up this one and use it


The rear sight looked good, the front one however was rough on the front edge, probably from the way it was stored. No worries, I had a new on in my parts collection. I'll save the old one for another project down the road


I removed the bluing and rust with some Navel Jelly


Then I wire wheeled the barrel, and sanded it to a 600 grit, then blended the areas with a Crocus cloth


In Part 4 we'll get the parts blued and assemble the gun