
Part 1
Part 2
When we left off we had finished up the sling swivels, now it's time to get back to filling the grain and applying the finish. After the hand rubbed initial coat has cured for 24 hours or more, I apply some oil then sand with 600 grit paper, using the oil as a lubricant I create slurry of sanding dust and oil, I then rub the slurry into the grain working it in all directions until almost dry, then move on to another spot on the stock.
On the next application I will use 800 grit, then 1200

Third coat sanded in


Now we start on some of the metal pieces
I cleaned up the old Mauser sling mount

I removed the butt plate, which I will bead blast and cerakote, but first I clean up the screws for bluing


While I was at it I cleaned up this vintage charging handle


Here are the parts after bluing

I also blued the grip cap screws....they look much better in black than zinc (zinc on right, blued on the left)

Next I install the rear sling swivel

Followed by the front swivel base, I had to trim the screws to make sure they wouldn't hit the barrel

Then I attempted to install the front sling loop.....and I didn't leave enough clearance....I'll tend to this problem later

I sent the parts off to have them Cerakoted, I am still not sure if I want to get set up to apply Cerakote, after seeing the results I am seriously considering it

I also installed the newly Cerakoted butt plate

Next I began assembling the trigger assembly, I am using a factory aluminum unit as a donor, I got it for free because someone broke the trigger guard


First to go in is the safety, I built this special tool (a pencil with a hole drilled in it) to make it easy.

Put the tool in the safety slot, line it up with the spring/plunger hole and insert the spring and plunger, then use a punch to push them down into their recess and slowly move the pencil to the side to trap the spring and plunger. Then follow the pencil with the safety, making sure to have the detent side down and the fire indicator to the left

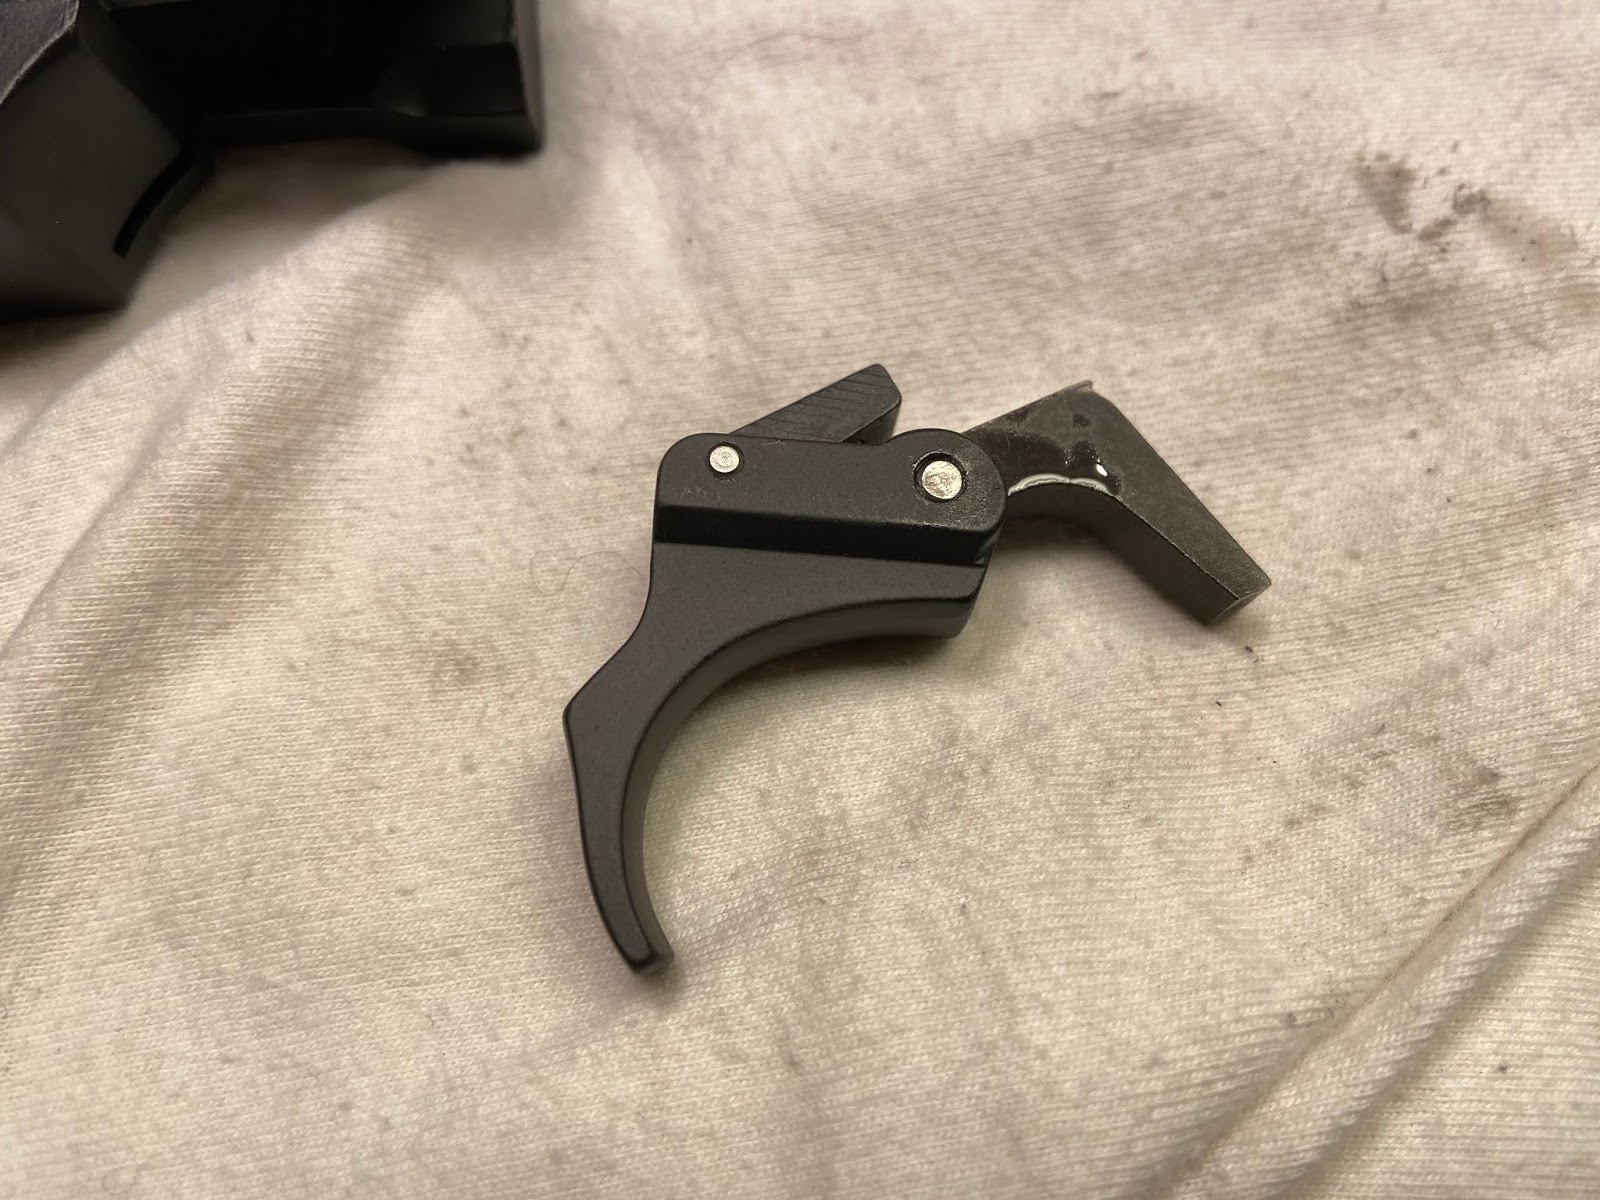
Next I move to the trigger/sear assembly, the sear needed to be cleaned up, this is where the hammer rides against it

polished like a mirror

to assemble them I use a special slave pin, it holds the sub-assembly together to ease installation. Once in place the trigger pivot pin pushes the slave out of the housing to be re-used on another installation

The hammer strut is new, the donor assembly was missing it

I polished the end where it interfaces with the hammer

Then I move to the hammer, it is hard to believe that the one place on a 10/22 that needs polishing, looks the worst.


I polished the sides where the bushings ride

Then began stoning the hammer


After stoning and polishing

Assembled, ready to rock

Next we tackle the barrel. I had plenty of spare barrels to choose from. This one looked bad on the outside, but minty fresh on the inside. Since I had to blue some parts anyway, I may as well clean up this one and use it


The rear sight looked good, the front one however was rough on the front edge, probably from the way it was stored. No worries, I had a new on in my parts collection. I'll save the old one for another project down the road

I removed the bluing and rust with some Navel Jelly


Then I wire wheeled the barrel, and sanded it to a 600 grit, then blended the areas with a Crocus cloth


In Part 4 we'll get the parts blued and assemble the gun
No comments:
Post a Comment