So I offered to help assemble a 10/22 rifle that could be raffled off to raise money for the site. See the thread here
Here are the parts we collected to assemble the rifle:
Factory take off barrel (new)
Factory V block and bolts
Factory bolt
Factory charging handle
Factory Walnut stock
Factory (new take off) aluminum barrel band
New set of Uncle Mikes Sling Swivels and Ruger logo sling
Factory 10 round magazine
Pro-Mag(?) 25 round magazine
Volquartzen auto bolt release
Timber Creek extended magazine release
Factory (new take off) take down screw
Custom made (by TCB) bolt buffer
Oversize trigger group pins
Bushnell Trophy 3-9x40mm Scope
Lance from Michigan Center Outdoors was kind enough to donate a trigger shim kit. I have used these kits before, but not on a 10/22 I was interested to see how much smoother the action would be. visit his website here and support him
Here is the stock we are starting with, a factory walnut stock, with fairly straight grain. It has some dings and dents, but nothing we can't clean up.
Here is the barrel, it is a new take-off, the blueing is perfect, but it got dinged up when the sights were removed, no worries, I know how to fix that
The trigger assembly is your typical plastic unit, we will swap out the trigger spring for a lighter one, polish the internals and add the trigger shims. We will also add a Volquartzen auto bolt release
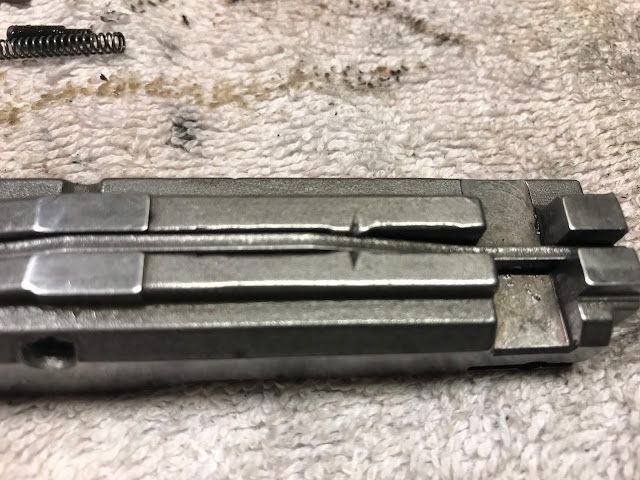
The bolt is stock, we will drill it for a roll pin to limit the vertical travel of the firing pin, polish and debur the internal parts, then polish and jewel the side
The charging handle is also stock, I removed this from my daughters rifle, it was in better shape than the other one I had.
Custom bolt buffer, I make these from stainless pins and Tygon tubing
The receiver is a 50th Anniversary one (2014), it is a new take-off. We will have the right side engraved with the Waguns logo
Here are the other parts: a new Uncle Mikes Ruger logo sling and sling swivel mount kit, a new take off aluminum barrel band, a new take off v-block and screws, a new take off scope rail and screws, A Volquartzen auto-bolt release and a Timber Ridge extended magazine release
The scope, provided by one of the forum members is a new in the box Bushnell Trophy variable 3-9 x 40mm.
The rifle will come with two magazines courtesy of yours truly, a factory BX1 10 round mag and a steel lipped mag with no name which I believe was made by Pro-Mag
Time to get started, we'll start on the stock, before sanding I needed to drill the hole for the swivel stud
I forgot to snap a picture of the hole, here it is after I stripped the finish off
I started to sand the wood, then figured I better get rid of the finish as it was quickly clogging up the sand paper
before sanding I decided I wanted to add some flutes to the comb, thin and redefine the grip area. So I marked out lines, making sure to point the flutes toward the toe of the stock
You can see how the grip is more accentuated now, the changes are subtle but help the overall appearance
Once we had the stock smoothed out to 400 grit, we add the first coat of oil, we will be using Minwax Antique Oil Finish
The first coat is rubbed in hard and left to cure for 24hrs, here it is after curing
Oils are not supposed to raise the grain, but they do to a small extent, for the next 3 coats we will coat small sections of the stock with oil and sand the oiled surface with 600 grit sand paper. This will remove any whiskers or high spots and create a slurry of fine saw dust and oil.
The slurry is then rubbed into the wood both with and against the grain. We let the oil cure for 24hrs in between coats.
If done properly, the wood will be supremely smooth and reflect light evenly in all directions
After 1 initial coat and 3 sanded in coats this is what the stock looks like
close up
for the final coat we again sand with the oil, but this time we wipe the stock down, with the grain, with a lint free cloth, this will remove any imperfections or dust or hair or anything else that might have been stuck in the oil before it cured.
We then let the stock cure for another 24 hrs


No comments:
Post a Comment