
Featured Gun: Winchester 250
Part One
Part Two
I cleaned the rust out of the outer magazine tube by using a .35 caliber brass brush and cleaning rod chucked into my drill
Then I worked over the outside, polishing to 600 grit

I started on the inner mag tube by disassembling it and cleaning up the knob


While Numrich Arms sells a reproduction brass replacement magazine tube:

I needed to keep my spending down to just the required items, so I decided to restore the original steel mag tube
Now I'll start on the small parts

The pits are pretty deep on the barrel cover, I thought about looking for a replacement....

...but instead I sand blasted it and the rear sight with aluminum oxide

Time to get the action stripped so I can clean the parts and touch up the finish. This is what the action looks like, minus the bolt

and disassembled, now I will clean up these small parts

I decided against having the aluminum parts Cerakoted. The process is labor intensive and thus expensive. I didn't want to sink more into the gun than it was worth. The receiver will need to be stripped, cleaned, primed, painted and then a coat of semi-gloss clear. The lever and lower receiver just needs some touch up.

I then cleaned up the internal parts, the rust was removed using Hoppes #9, 0000 steel wool, the wire wheel on my bench grinder and a wire wheel attachment on my Dremel tool. The trigger and safety will be getting reblued, the rest will be oiled and installed in the gun as is.

The bolt is next, in this picture you can see the jeweling done by the factory

The first pin came out easy, the second one had a hole that was not fully drilled by the factory.
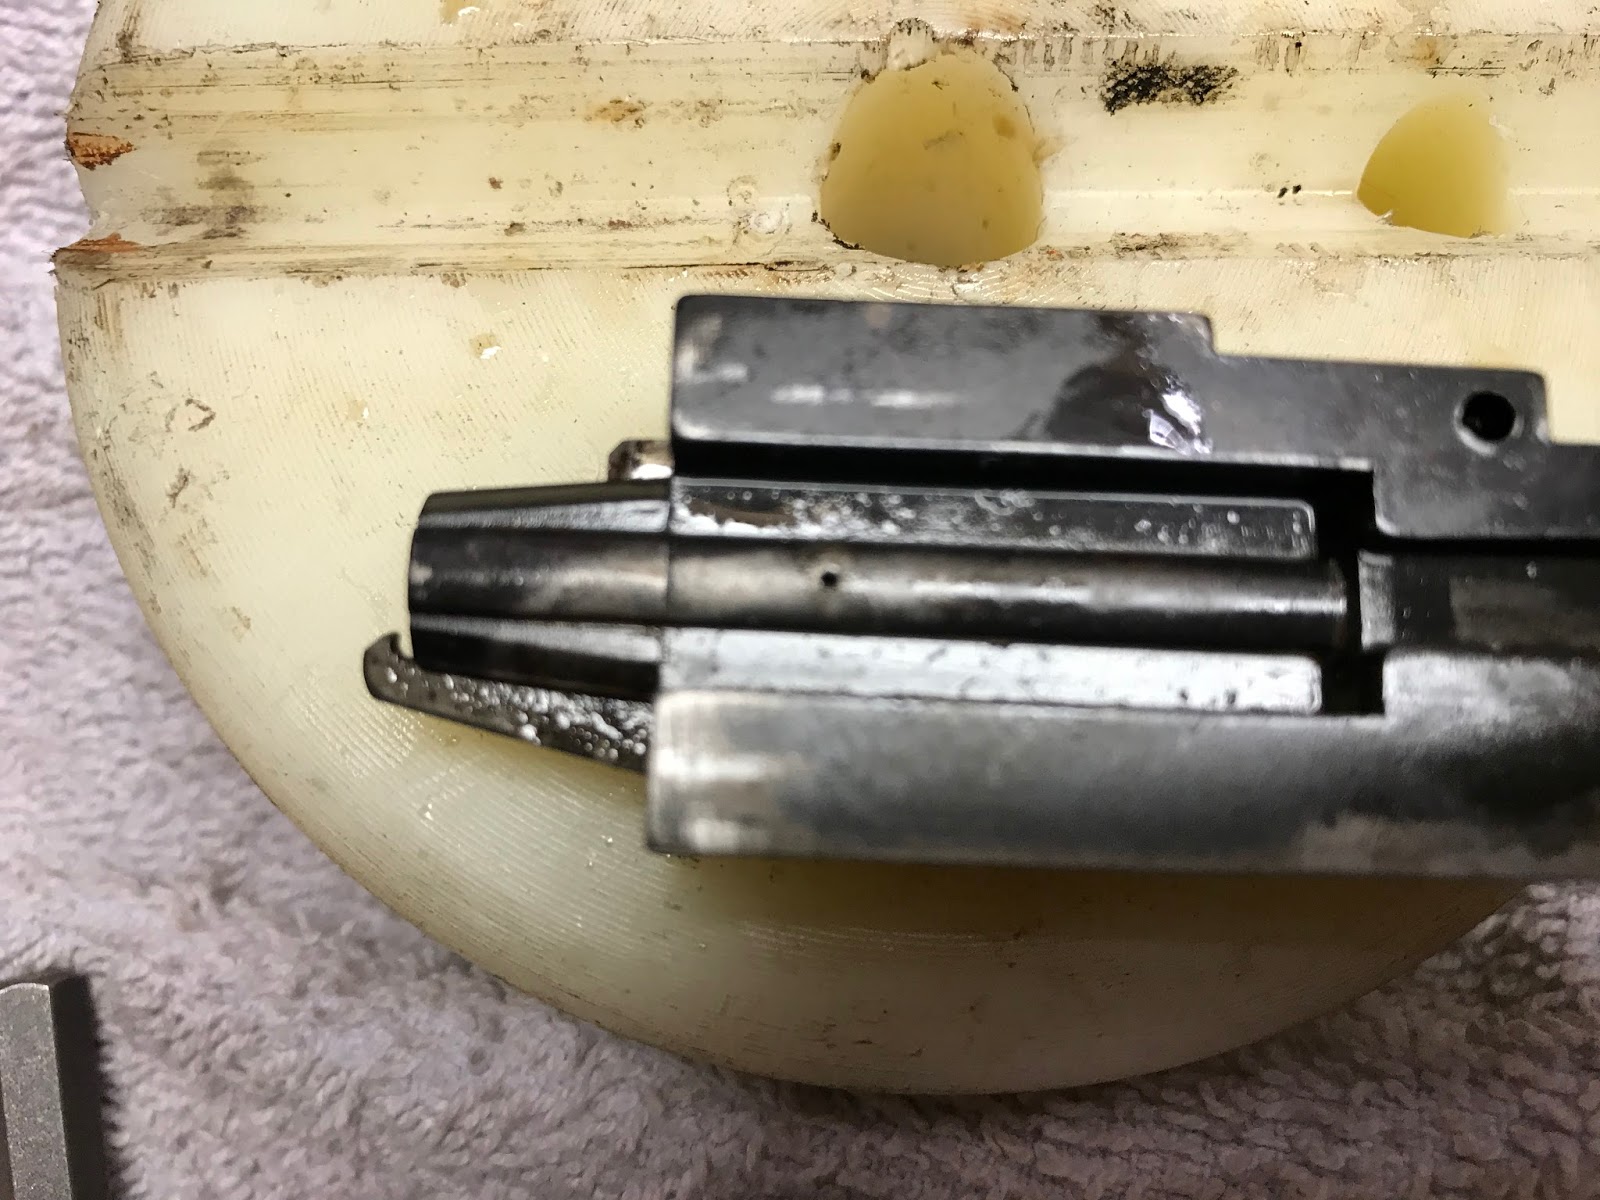
This is the other side, both sides should look like this

I drilled the hole out just enough to get a punch in, the metal was hardened and would not yield easily.

Here are all the parts out. The spring works as both the firing pin return spring and the extractor spring. The ball bearings make the items move easier.

The firing pin and extractor were polished

I measured the swirls, they were just under 1/4" (.250") at about .223"

Here is the bolt after cleaning up with the wire wheel


The bolt after polishing on the buffer

This steel brush came from my Dremel set, it measures just a little smaller than the swirls, under pressure it will spread out and give me approx. .250" swirls

I centered and squared up the vice (very important step), smeared on the valve grinding compound and began making swirls. I overlapped them by 50%

Done, like a lot of things, you need natural light to really see the shine.

I then oiled and reassembled the bolt

Stay tuned for part 4
No comments:
Post a Comment