
This is the second Dan Wesson that I have refinished, the first one, a model 15-2 can be seen here.
This particular revolver is a model 14-2, built in the original Monson, MA "school house" factory back in 1980.
The model 14 features fixed sights whereas the model 15 has an adjustable rear target sight.
This gun sports a 4" modular barrel, a feature that set Dan Wesson's apart from the herd.
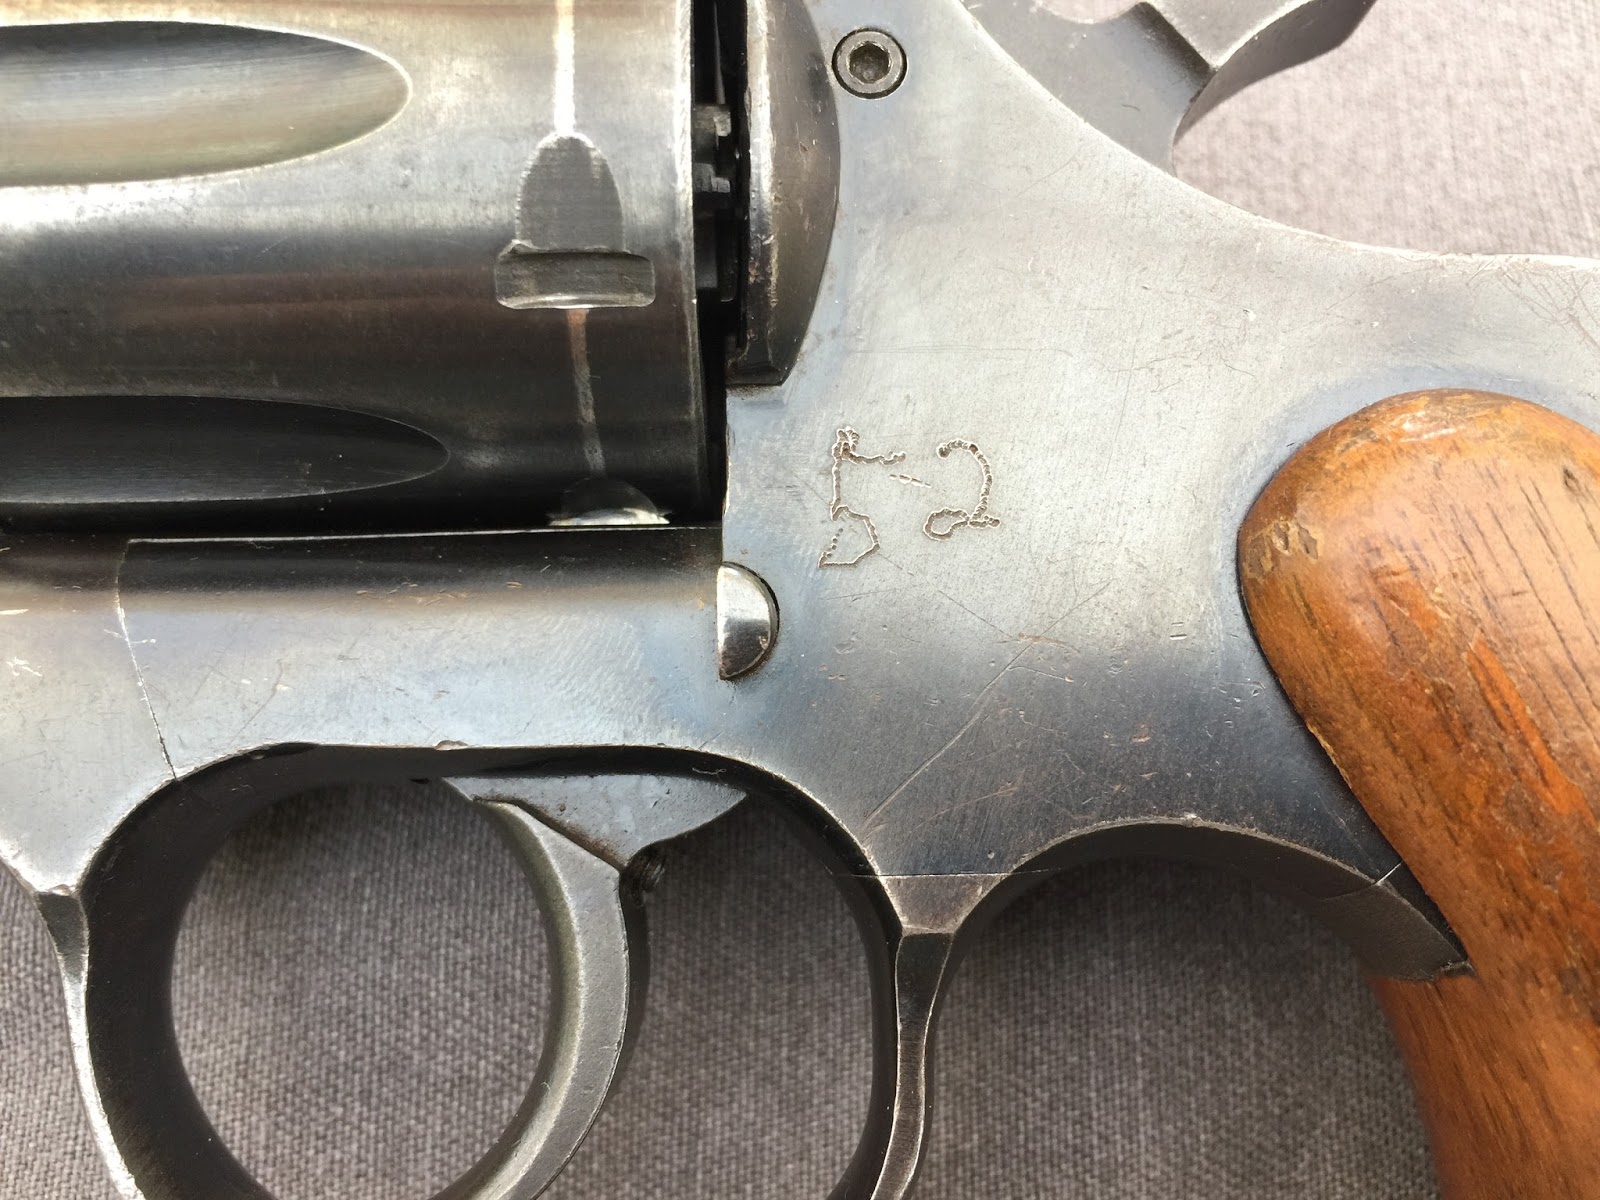
We believe this gun was originally issued to a law enforcement or security officer. Evidence exists in the form of excessive holster wear on barrel and the end of the grip is worn down pretty good. Another piece of evidence is a number "52" engraved into the side plate.
Here are the before pictures:


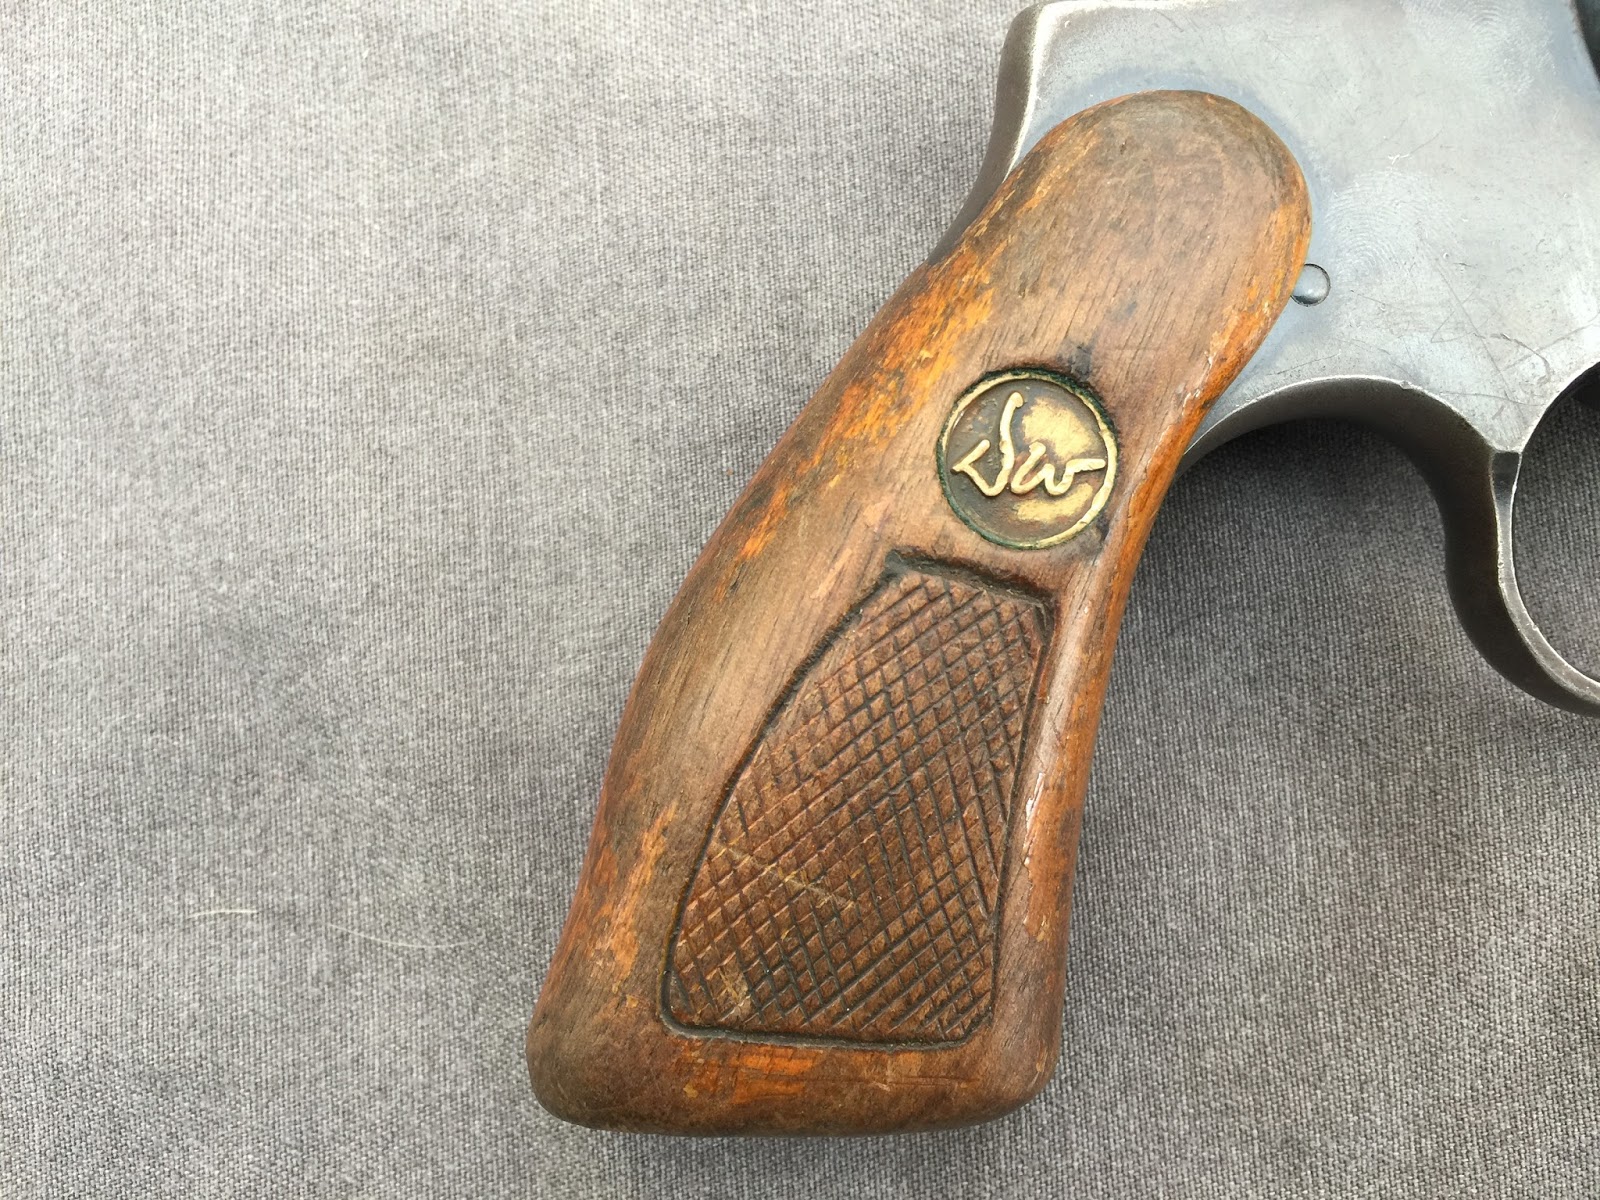
The factory combat stocks are pretty beat up, not much collector value left in them, so we will make an attempt to restore them by sanding, refinishing and re-cutting the checkering

One piece of evidence that this gun was issued to a law enforcement officer, the number "52" inscribed into the side plate with an electric pencil.
Holster wear on the barrel and cylinder


The top of the gun is sand blasted, we will mimic this with some black aluminum oxide abrasive.

The first step is always disassembly, the Dan Wesson revolvers use a bolt on the bottom of the stock, 5/32 Allen wrench removes it

The area blocked by the stock shows us what the original finish looked like, we can also get a close look at the # 52 engraved into the side plate as well as the abuse the back end of the revolver took as it rode around in the duty holster.

After removing the two side plate cap screws with a 3/64 Allen wrench, the screws were a bit stripped out, I'll see if I can find some.
The side plate comes off with a couple of good whacks from a dead blow or nylon faced hammer, never use a screw driver.

The internals are certainly different from a Smith & Wesson. You may notice the side plate is on the opposite side from a Smith and the cylinder rotates clockwise, into the frame, again the opposite of a S&W revolver. This is probably a lesson learned by the designer (Lewis) from his days at Colt. The spinning of the cylinder into the frame makes for a tighter lock up.

To capture the hammer spring, you cock the hammer and thread in the longer of the two side plate cap screws, the end of the hammer strut is threaded to accept this cap screw.
The cylinder is removed from the crane by securing the ejector rod and turning counter clockwise. I inserted some junk 38 Special brass to secure the extractor. I had to use pieces of oak as the pine wood I normally use just crushed and let the rod spin.

The cylinder release is removed via a small Allen head screw, using a .050" Allen wrench, note the spring, set in a U shape.

Now that we have it disassembled we can remove the old bluing. I use Naval Jelly, which is phosphoric acid, it is not very strong, but it removed the old bluing and any rust.

After letting the naval jelly sit on the surface for a few minutes I run it under hot water to neutralize the acid

Then I gently buff the surface with the wire wheel

In part two we will begin the sanding, filing and polishing