Sunday, October 26, 2014

Monster Hunting Kits

All Hallow's Eve is just around the corner....time for a Halloween themed post.

I thought this year I would revisit the Vampire Hunter Colt that I posted last Halloween as well as show you a couple of tribute guns. In addition I compiled some pictures of similar "Monster Hunting Kits"....but first some history......

During the Summer of 1816, several writers met on the shores of Lake Geneva, Switzerland. Among the attendees were Lord Byron, Mary Godwin-Shelly, Percy Shelly and John William Polidori.
One evening, while consuming copious amounts of adult beverages and telling "German Ghost Stories" (perhaps the legend of the werewolf was one of them?) Lord Byron proposes that each of them author a "ghost story".
The results of that challenge were the stories of Frankenstein and Dracula (originally a short story simply entitled: Vampyre)....and the world has not slept well since. 
80 years later an Irishman by the name of Bram Stoker, wrote a novel based on Vampyre. That novel was of course Dracula. In the novel the arch nemesis of the evil Count Dracula was a man by the name of Abraham Van Helsing. Helsing led a small group of people in the hunting of the Count Dracula and thus the "Monster Hunting Kit" was born.


Last year we brought you the pictures of the Vampire Hunter Colt from the National Firearms Museum (part of the Robert E. Peterson Gallery) 
We also covered the Zombie craze here craze, here, and here.


Here is the original Vampire Hunter Colt Detective Special, engraved by Leonard Francolini. The gun is a .38 Special, that has full coverage engraving, a lanyard loop, ebony stocks. The gun was silver plated and the small parts were nitre blued. 
remember to click on the pictures to see a hi-res version


The following two tribute guns were engraved by Wayne D'Angelo:
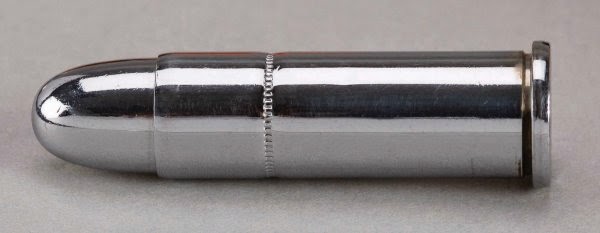
 This 1st one has a similar coffin case with silver bullets and some Holy Water


Here is the second tribute gun


This one sports ivory grip panels with vampire scrimshaw


Here are some pictures of other Vampire & Monster Hunting tool kits, among the items featured in these kits include:
  • Wooden stake and hammer
  • Bible
  • Crucifix
  • Rosary Beads
  • Holy Water
  • Mirror
  • Pistol with Wood and/or Silver bullets
  • Garlic/Garlic Oil
  • Knives
  • Brass Knuckles
  • Hatchet
  • Candles
  • Gold and Silver Flake
  • Pliers 
  • Essential Oils


 To properly dispatch a vampire with a gun you'll need bullets made of wood, this Steampunk revolver's (a Civil War era Lemat) shotgun barrel has been modified to accept a stake projectile
Wood is great for Vampires, but according to lore, you need silver bullets for Werewolves:

 Of course for Zombies you need special Zombie Ammo:

 This unique kit from Coonan comes with silver-tip .357 magnum cartridges and a wooden stake, they call it the "Triple Threat Apocalyptic Kit", it will dispatch Werewolves (silver bullets), Vampires (wooden stake) and Zombies (either the bullets or the stake, but make sure you get them in the head....)


Links:
Nutmeg Sports
National Firearms Museum
Guns America


Monday, October 20, 2014

jukkOu's Mak 90 project

From time to time I will be documenting work by other novice gunsmiths. This project belongs to one of our local forum members. He decided he wanted to convert his Mak 90 Sporter (Chinese AK-47) into a combat style by adding the correct Front Sight Base with Bayonet mount and threading the barrel for a muzzle brake. The words and photos are his.

just for reference, here is a stock Mak 90 Sporter:


First step (before BUYING the parts) is to measure the barrel to ensure enough material was left to cut new threads. Tool is positioned to facilitate photography.


 The necessary tools and parts were ordered from the Polytech Store


The barrel of gun is set between two wooden blocks to hold it fast for working.
 Wrapped teflon tape around the Thread Alignment Tool to protect the barrel and hold the TAT more tightly in place.
He had to re-cut the threads on the TAT (Thread Alignment Tool) since Brownell's sent it with a HUGE ding in the center of the tool's threads.

Next step was to insert the TAT into the die, and snug it in place with the slant brake. then insert into barrel. Lettering on the die is facing the "work". Insert die into die handle. The die is adjustable so back out the adjustment screw to cut the shallowest threads possible. With no adjustment thereafter, the threads were perfect after the first cutting.


 The die handle also required some machining to get the burrs off of the holes tapped into it for the set screws which hold the die in place....

Plenty of cutting oil: Oil, turn die to the left and back off... retract TAT the same amount of turns...oil turn left... back off...adjust TAT... repeat.

IMPORTANT: the TAT must be backed out of the die as you progress or else it will contact the end of the barrel and prohibit the die from progressing as it cuts, which would strip your new threads right off the barrel!!! At some point you can just remove the TAT.

Cut the final few threads a little at a time, checking the brake for proper "clocking"/alignment with detent post.

Tah DAH!

 Installing the new Front Sight Base presents a more technical problem as the old FSB is pressed firmly in place. A few tentative taps with a ball peen, once the retention pins were removed, were ineffective. Much consternation and cogitation to follow.... 


Most folks mention using a 20 or 30 ton press, and others say a brass punch and hammer.
It is drenched in penetrating oil currently.

The new FSB shows some shallow holes for pins on the left side, but don't appear to go all the way through. This presents another hurdle to surmount:


Received some tools from Robert Forbus. Nice guy. Very attentive and precise. Got some pin punches and a jig set for pulling and pushing:


He made a backer plate for the jig from some scrap:

add a little brass button to top the barrel and start pushin':
Eureka!


FSB is on!

I had polished the mounting area but when I pressed it on it got only this far before it really bound up.


So, back off it came and He removed material with a file. The barrel had concentric lathe marks (?) the whole length of it. Flattened those out... test fit, press off, file... rinse,  lather, repeat.... success!
Finished


To finish off the project, the owner added some more traditional wood furniture without the thumbhole