
just for reference, here is a stock Mak 90 Sporter:

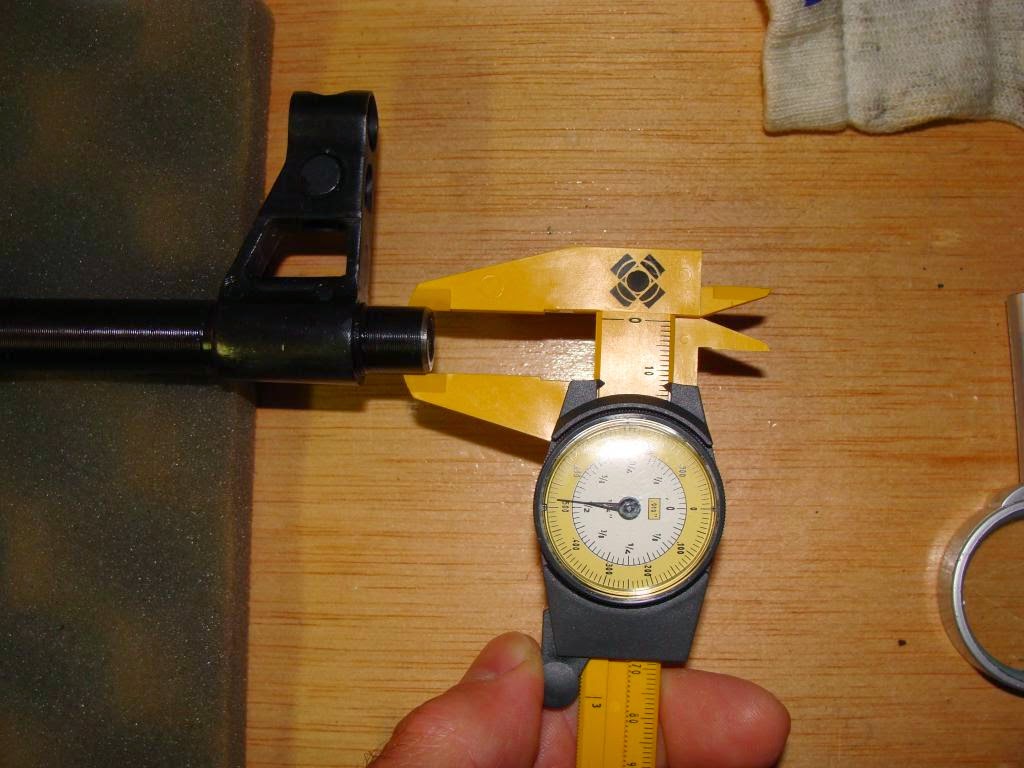
First step (before BUYING the parts) is to measure the barrel to ensure enough material was left to cut new threads. Tool is positioned to facilitate photography.
The necessary tools and parts were ordered from the Polytech Store


The barrel of gun is set between two wooden blocks to hold it fast for working.


Next step was to insert the TAT into the die, and snug it in place with the slant brake. then insert into barrel. Lettering on the die is facing the "work". Insert die into die handle. The die is adjustable so back out the adjustment screw to cut the shallowest threads possible. With no adjustment thereafter, the threads were perfect after the first cutting.


The die handle also required some machining to get the burrs off of the holes tapped into it for the set screws which hold the die in place....
Plenty of cutting oil: Oil, turn die to the left and back off... retract TAT the same amount of turns...oil turn left... back off...adjust TAT... repeat.
IMPORTANT: the TAT must be backed out of the die as you progress or else it will contact the end of the barrel and prohibit the die from progressing as it cuts, which would strip your new threads right off the barrel!!! At some point you can just remove the TAT.
Cut the final few threads a little at a time, checking the brake for proper "clocking"/alignment with detent post.
Tah DAH!


Most folks mention using a 20 or 30 ton press, and others say a brass punch and hammer.
It is drenched in penetrating oil currently.
The new FSB shows some shallow holes for pins on the left side, but don't appear to go all the way through. This presents another hurdle to surmount:


Received some tools from Robert Forbus. Nice guy. Very attentive and precise. Got some pin punches and a jig set for pulling and pushing:


FSB is on!
I had polished the mounting area but when I pressed it on it got only this far before it really bound up.


To finish off the project, the owner added some more traditional wood furniture without the thumbhole


Very nice job. I think those full length barrel machining marks that look like shallow threads were from machinists running the travel on the lathes faster than allowed for a smooth finish but just enough to pass the inspector. It speeds up production but doesn't look as pretty.
ReplyDelete