This is a short update to my project from 2015. See the final post of that build here
Just as a reminder I bought this 3-screw (old model) Ruger Blackhawk for a very reasonable price. It was in pieces and a few pieces were missing.
What got my attention was the brass bird's head grip frame. It was a Qualite unit, made for a New Model Blackhawk and it eventually found its way to my 357 Vaquero along with a set of homemade teak grips and a boot dagger to match. See that project here
I ended up customizing a brass grip frame from an Italian made copy of the Colt model of 1851. I also made some custom grips from bloodwood along with a botched-up rust bluing job.
I have a very unique revolver, one that could be converted back to original with very little work.
So why am I telling you this? Well, I was on ebay the other day and found someone selling brass ejector rod housings and I thought perhaps I should buy one and put it on my custom old model Blackhawk.
The seller did not know what model of gun these were made for, he could only provide the overall length, which was approx. 4". I thought I would take the risk and see if it would fit my Blackhawk.
Then I found this ad:
I had also been planning on installing a customized ejector. I had seen these on the internet and wanted to try my hand at checkering some steel. I posted this part of the project before, see it here
I had an extra ejector rod that needed to be reblued anyway, so I broke out my collection of files. I chose the 00 or 20 lines per inch file.
After clamping in the vice, between two pieces of pine, I started with the first direction
Then I had to figure out the right angle so I ended up with diamonds instead of squares
Second set cut
Then I cleaned it up on the wire wheel
Then I blued it using the hot salts method (I was bluing some other guns and threw it in the tank
When the ejector rod housing arrived, I found that it was longer than the factory Ruger one, but the screw hole did line up. The problem was my ejector rod housing screw fell right through.
This was made for a Colt or the older Rugers which used a 1/4" diameter threaded cap nut that screwed onto a 6-40 stud that was threaded into the barrel.
Sometime before my 1972 Blackhawk, Ruger switched to a shouldered bolt that is threaded for 8-36 and has a diameter of .217", thus my shouldered bolt falls right through the .250" hole.
I thought I would try to see if I could create a 1/4" diameter shoulder using a washer filed to fit, but the threads were not long enough, and the bolt would sit proud of the housing.
- I could try to find a threaded cap that had a #8-36 threads and a 1/4" diameter, which is not likely. I thought briefly about the S&W thumbpiece cap screw (ejector), but it is threaded for a much larger stud.
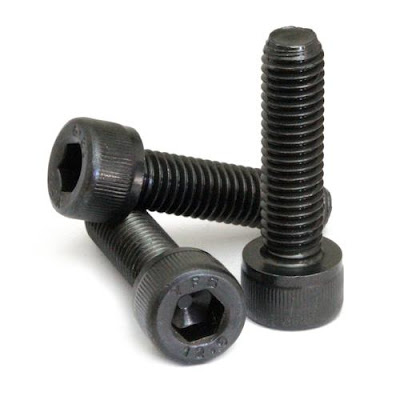
- I could use a #8-36 screw either an Allen head/socket cap screw or a Fillister head screw and turn down the head of the screw to fit the 1/4" hole
- I could custom make a screw threaded for 8-36 with a 1/4" diameter. This is not within my skills, someday I hope to have the skill and equipment to make my own screws.
- Have a screw custom made. This would be cost prohibitive, but then again, if there are other people looking for this same screw, I may be able to sell some of them, off setting the cost....
and some 8-36 Fillister head screws that are 1" long
I figured I would try the Allen head socket screw first
I wrapped the threads to protect them from the drill chuck
I used a file and to get close, then 225 grit sandpaper until the screw just fit
The thread protrusion looked about right
I test fit the screw and ejector rod housing, the fit was very good
Here is the ejector rod button, you can see the fit at the barrel, looks like a factory installation
I'll update this when I get a chance to modify the Fillister head screw and then blue the screw to match. I may build a spacer so the screw head will fit flush with the housing.


No comments:
Post a Comment