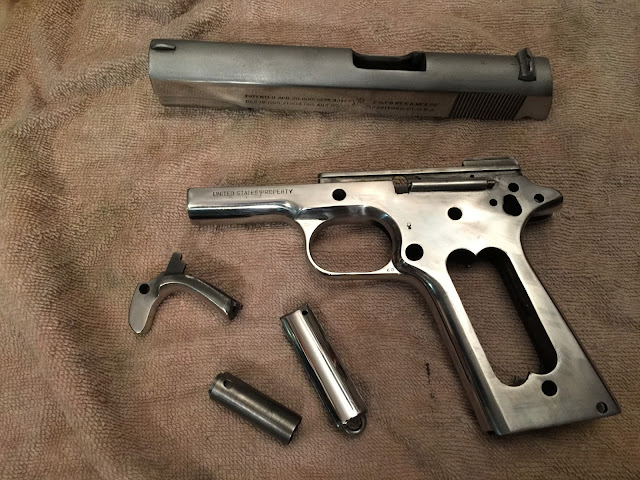
This gun originally was blued with an un-polished surface during WWI, then it was rebuilt with a new slide and parkerized during WWII. At some point after it left the service of the U.S. Army it was painted. The current care taker of the pistol removed the paint and then asked me to reblue the gun.
The question I asked was "how would you like it restored"?
After a discussion regarding the history of the pistol, the caretaker decided to put a high polish blue on it.
Here are the pictures of the gun before we started:


close up of the "black army" finish

The owner of the gun wanted the pistol to sport a high polish blued finish, like the civilian models Colt produced.
There are a couple of ways to due this
We could polish every surface, trying not to round the corners....or we could round the corners (often called a "melt job").
When inspecting the gun before dis-assembly, I noticed the grip safety was not working, the hammer would fire without depressing the safety.
A couple of the grip screws and the magazine release screw were a bit buggered up, I'll replace the mag release screw and restore the grip screws (also note the aforementioned RIA stamp)

The grip safety has a stepped ledge that blocks the triggers rear movement until pushed in (and pivoted upwards) by the shooters hand
 In order
to see what was happening, I partially assembled the gun and took a look
through the thumb safety hole (note the heart shaped opening in the
grip, this is also indicative of later WWI production guns)
 It
appeared the spring as not pushing back on the safety causing it to slip
past the trigger, so I tweaked the spring to see if that would cure the
problem.
The spring "adjustment" fixed the problem, so we will add a new spring to the list of parts
In the end the owner decided that we would bead blast just the top of the slide.
I started on the slide using 220, then 320, then 400 and 600 grit sand paper backed by a piece of hardwood
I then moved up to 1000 grit
and finally 2000 grit
I taped off the polished parts so I could sand blast the top of the slide
Now the work begins on the frame. For the first time since 1918, metal is going to be removed from this Colt.
My mind sometimes wanders when I am working on guns.....I was thinking about the Colt employee who put this gun together. They probably rode a horse to the Hartford plant (or maybe a bike?) as cars were still pretty new and expensive in 1918.
I wondered what they were thinking when they worked over this same steel. Were they thinking about the finishing of the guns and how it changed from the Colt signature high polish finish to the rough machined finish or were their thoughts with the Doughboys fighting "over-there"? Did maybe they know someone who was fighting in the war?
I followed my typical routine, start with 100 or 220 grit and gradually move up to 1000 grit and always using a hardwood backer (a file works as well)
I worked over just about every part, including the bottom of the ears above the grip safety
I sanded the back of the gun with the main spring housing in place. This prevents you from rolling the edges and makes the two parts look like they were once one part
The front strap and trigger guard will get a super high polish with the buffer. No need for a backer here, no holes or roll marks and the parts are already round.....
The frame, slide, main spring housing and grip safety are ready for bluing...now I need to get to work on the small parts
Part of the plan was to nitre blue the hammer, trigger, slide release and thumb safety. So I polished them with sand paper to 600 grit
Then I nitre blued them
After nitre bluing the parts above, I realized that I forgot the pins and grip screws....
The grip screws were a little mangled...
normally I would restore them myself, but with so many projects on the table and the fact that these are cheap and easy to find...I ordered a new set for $4.50 including shipping
Stay tuned for part 2
Credits
Skimbell from the High Road
Miller Custom Gunsmithing


