
Part 4
Time to work on the barrel shroud....I want it to look something like this only vent holes running the whole length

I looked into buying one, but the ones I found were either too short or prohibitively expensive...so I will have to build one myself.
So I scrounged around the shop and this is what I found:
3/4" IPS PVC tubing, it fits over the barrel but isn't so big as to be obtrusive.

I want to bring it right up to the edge of the receiver, but the old school scope rail hangs over the edge.

Luckily I had a newer production one that is flush with the receiver.

I cut the tube to length and notched it for the barrel tennon


I still need to remove material from the stock so the barrel will be in the center of the tube


I am planning on using these 10-24 bolts and T nuts (on the left)

While modifying them to fit in the round tube, I screwed up the threaded part....and like a dummy I had only purchased two of them, so I ordered some more

While I wait for the T nuts to show up, I went on with the building of the building of the shroud. I had these two shrouds that were made for the 10/22, I think I like the larger holes better.

Before marking the holes I found the center line and trimmed the tube to length

I just happen to have the right drill bit that matched the holes in the store bought shroud.

First set of holes drilled, I drilled them 1" on center. Some got off center. It was next to impossible to put the tube in a vice as it "oblonged" when the vise was tightened.

I then marked and drilled the side holes, in the center of the gap between the top and bottom holes.

I was not at all happy with the holes, some are oblong, some are not straight, but before starting over I figured I would paint it first. black textured paint has a way of hiding flaws
...and I was right, with the black textured paint on the shroud, you have to look hard to find the boo boos

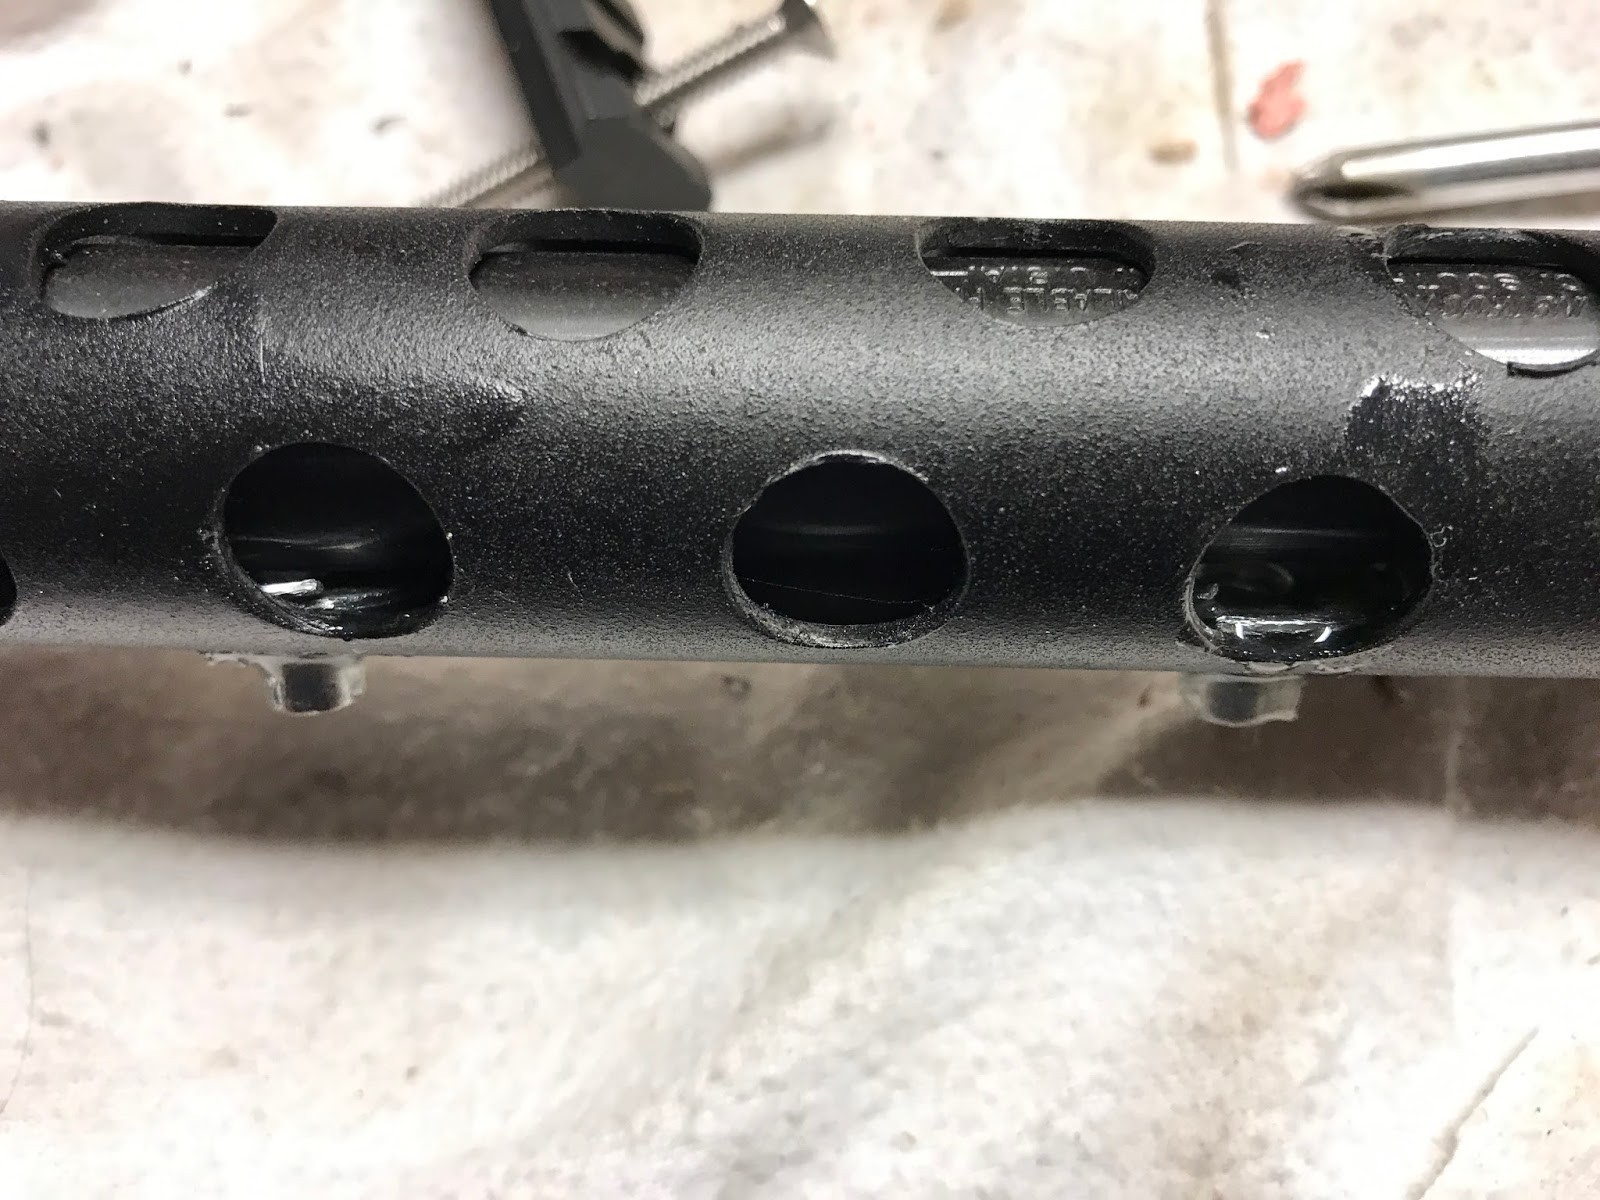
Back to the T-nuts, I got another set (I bought 8 of them this time....). I flattened out the lock tabs and curved the flange to match the round shroud.

I then epoxied them in place

I then ran into a snag, the T-nits were hitting the barrel and causing misalignment, this won't work, I'll have to find another way, maybe attach them to the outside of the shroud?
After some debate back and forth, I decided to build another shroud, perhaps correct some of the mistakes I made on the first one.

I then modified another pair of T-Nuts

I had to route out a recess for the T-Nuts to sit, so they didn't cause misalignment with the barrel/shroud

After taping up the barrel channel, adding clay to the T-Nut threads and screwed in the picatinney rail bolts, I mixed up some 5-minute epoxy and clamped everything together. We want the T-Nuts to be glued to the shroud in perfect alignment with the holes for the picatinney rail screws

We have success!

While the paint was drying on the shroud I shortened the bolts

After a couple of coats of paint it is ready for prime time

Were nearing the final stretch, stay tuned for part 6