
Before cutting and attaching the butt stock I wanted to fit the rear tang and bed the receiver. I found this flanged washer in my nut and bolt bin, I have no idea where it came from, but it is perfect for this application. I'll install in in the front action screw hole so when the screw in tightened the wood cannot flex and cause the barrel to change point of aim.

I could have bought one of these units made for the 10/22, but again, we have to stick to a budget and use as many DIY solutions as we can.

I drilled out the hole to 3/8" and checked the fit.


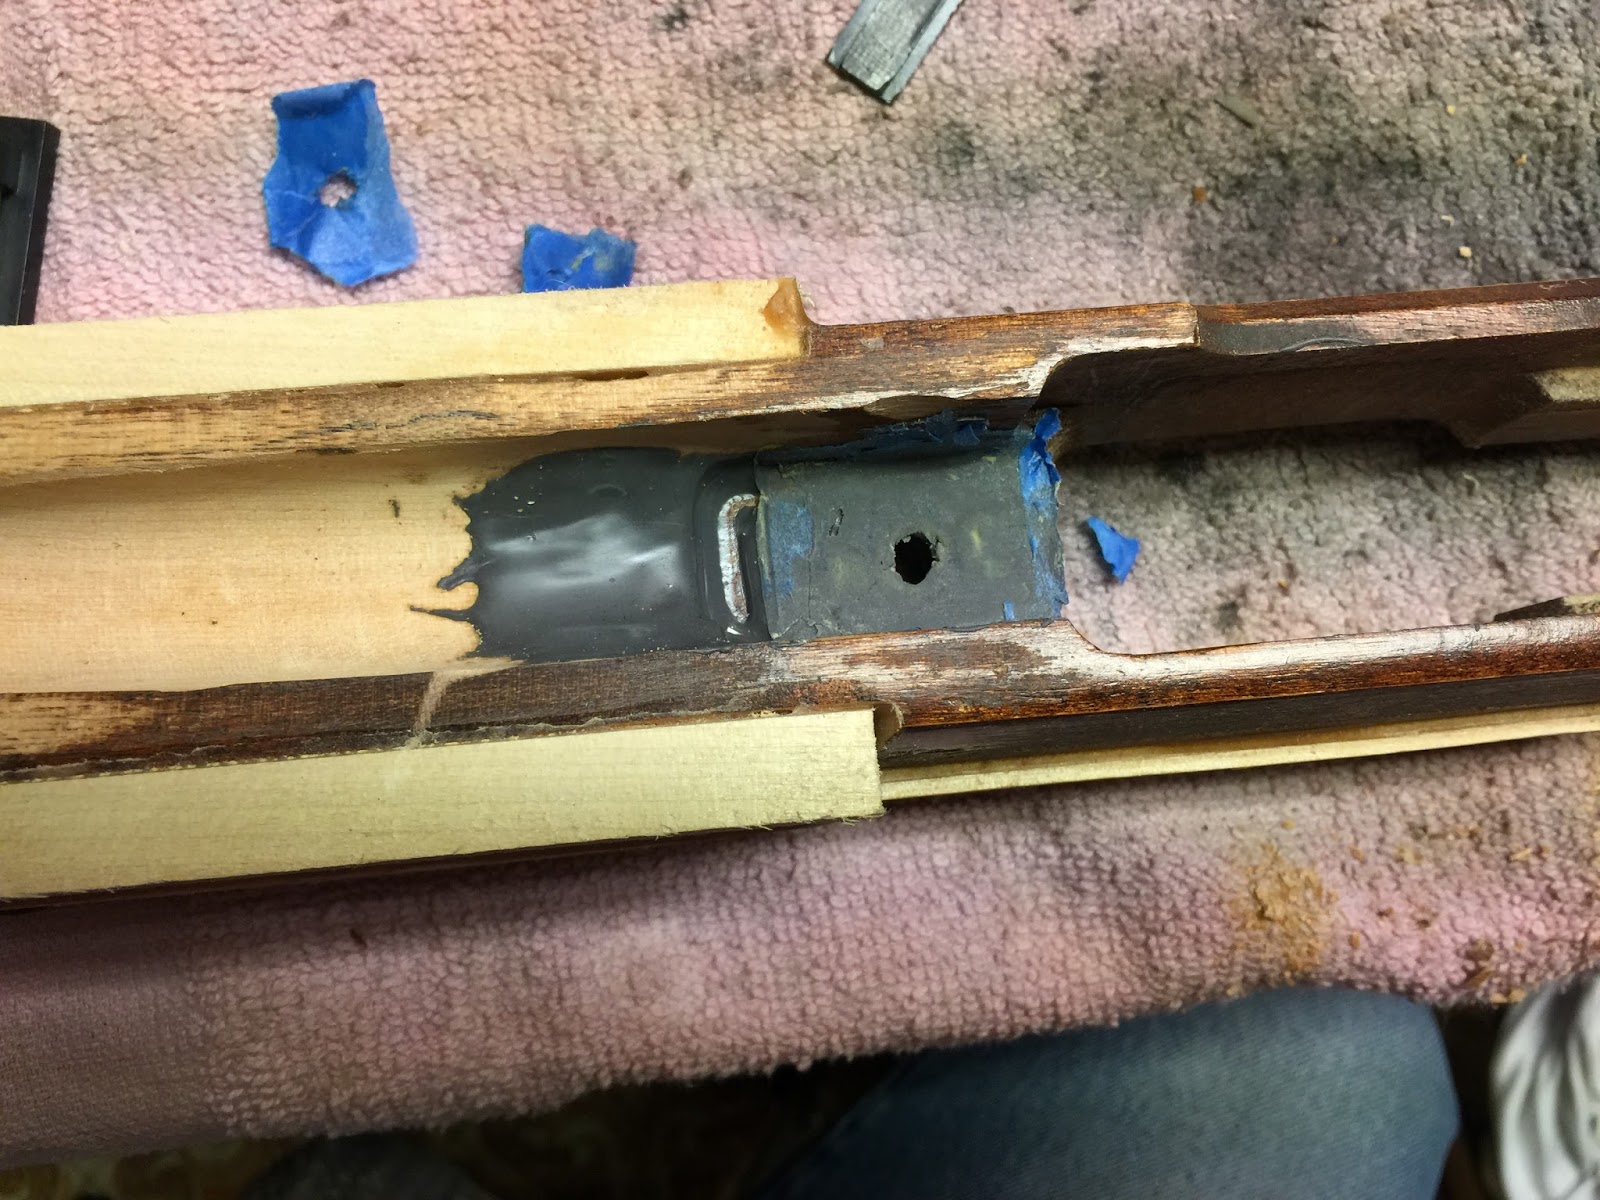
Next I marked and removed the wood to make room for the rear tang and anchor


Before mixing up the bedding compound (JB Weld) I cut a groove in the anchor to help the JB Weld "bite" into the metal

I then taped up the receiver and barrel, then coated the threads with wax. Mixed up the JB weld and put the receiver in the stock using a clamp to hold it down.


Here it is after mucho sanding, still some work to do, but I'm getting close


This time I added release agent (wax) to the taped areas so it would not stick.

It doesn't look pretty on the inside, but no one will see that and it does what it supposed to do, support the action front and rear.
I probably should have used Devcon, instead of JB Weld, but I already had JB Weld, so another lesson learned.
The yellow residue is wax, the blue is the tape...I'll clean up the over flow before we're done.

