
If you missed part one, click here
We have got the parts blued, now I need to get to work on the stock.

The only part that had any blemishes was the barrel, some of this will be hidden by the rear sight.

Before starting on the stock, I painted the safety and ready fire indicators with red Testors enamel model paint


Next I begin putting the receiver together...the parts must be installed in the correct order or you have to take it apart again......ask me how I know....
I also used some thread locker on the plug and scope mount screws

Next I work on the stock, before putting the butt plate on I clean it with some carnuba wax and an old tooth brush


It may not look like it got any cleaner, but look at the outline left in the towel.


Then I cleaned up the factory magazine, it had some small spots of rust, some gun oil and a bit of 0000 steel wool and it cleaned up pretty good. This is the before picture

the brass frogs had some thick verdigris that I needed to take care of


after getting rid of the green scum, I treated the leather with some neatsfoot oil

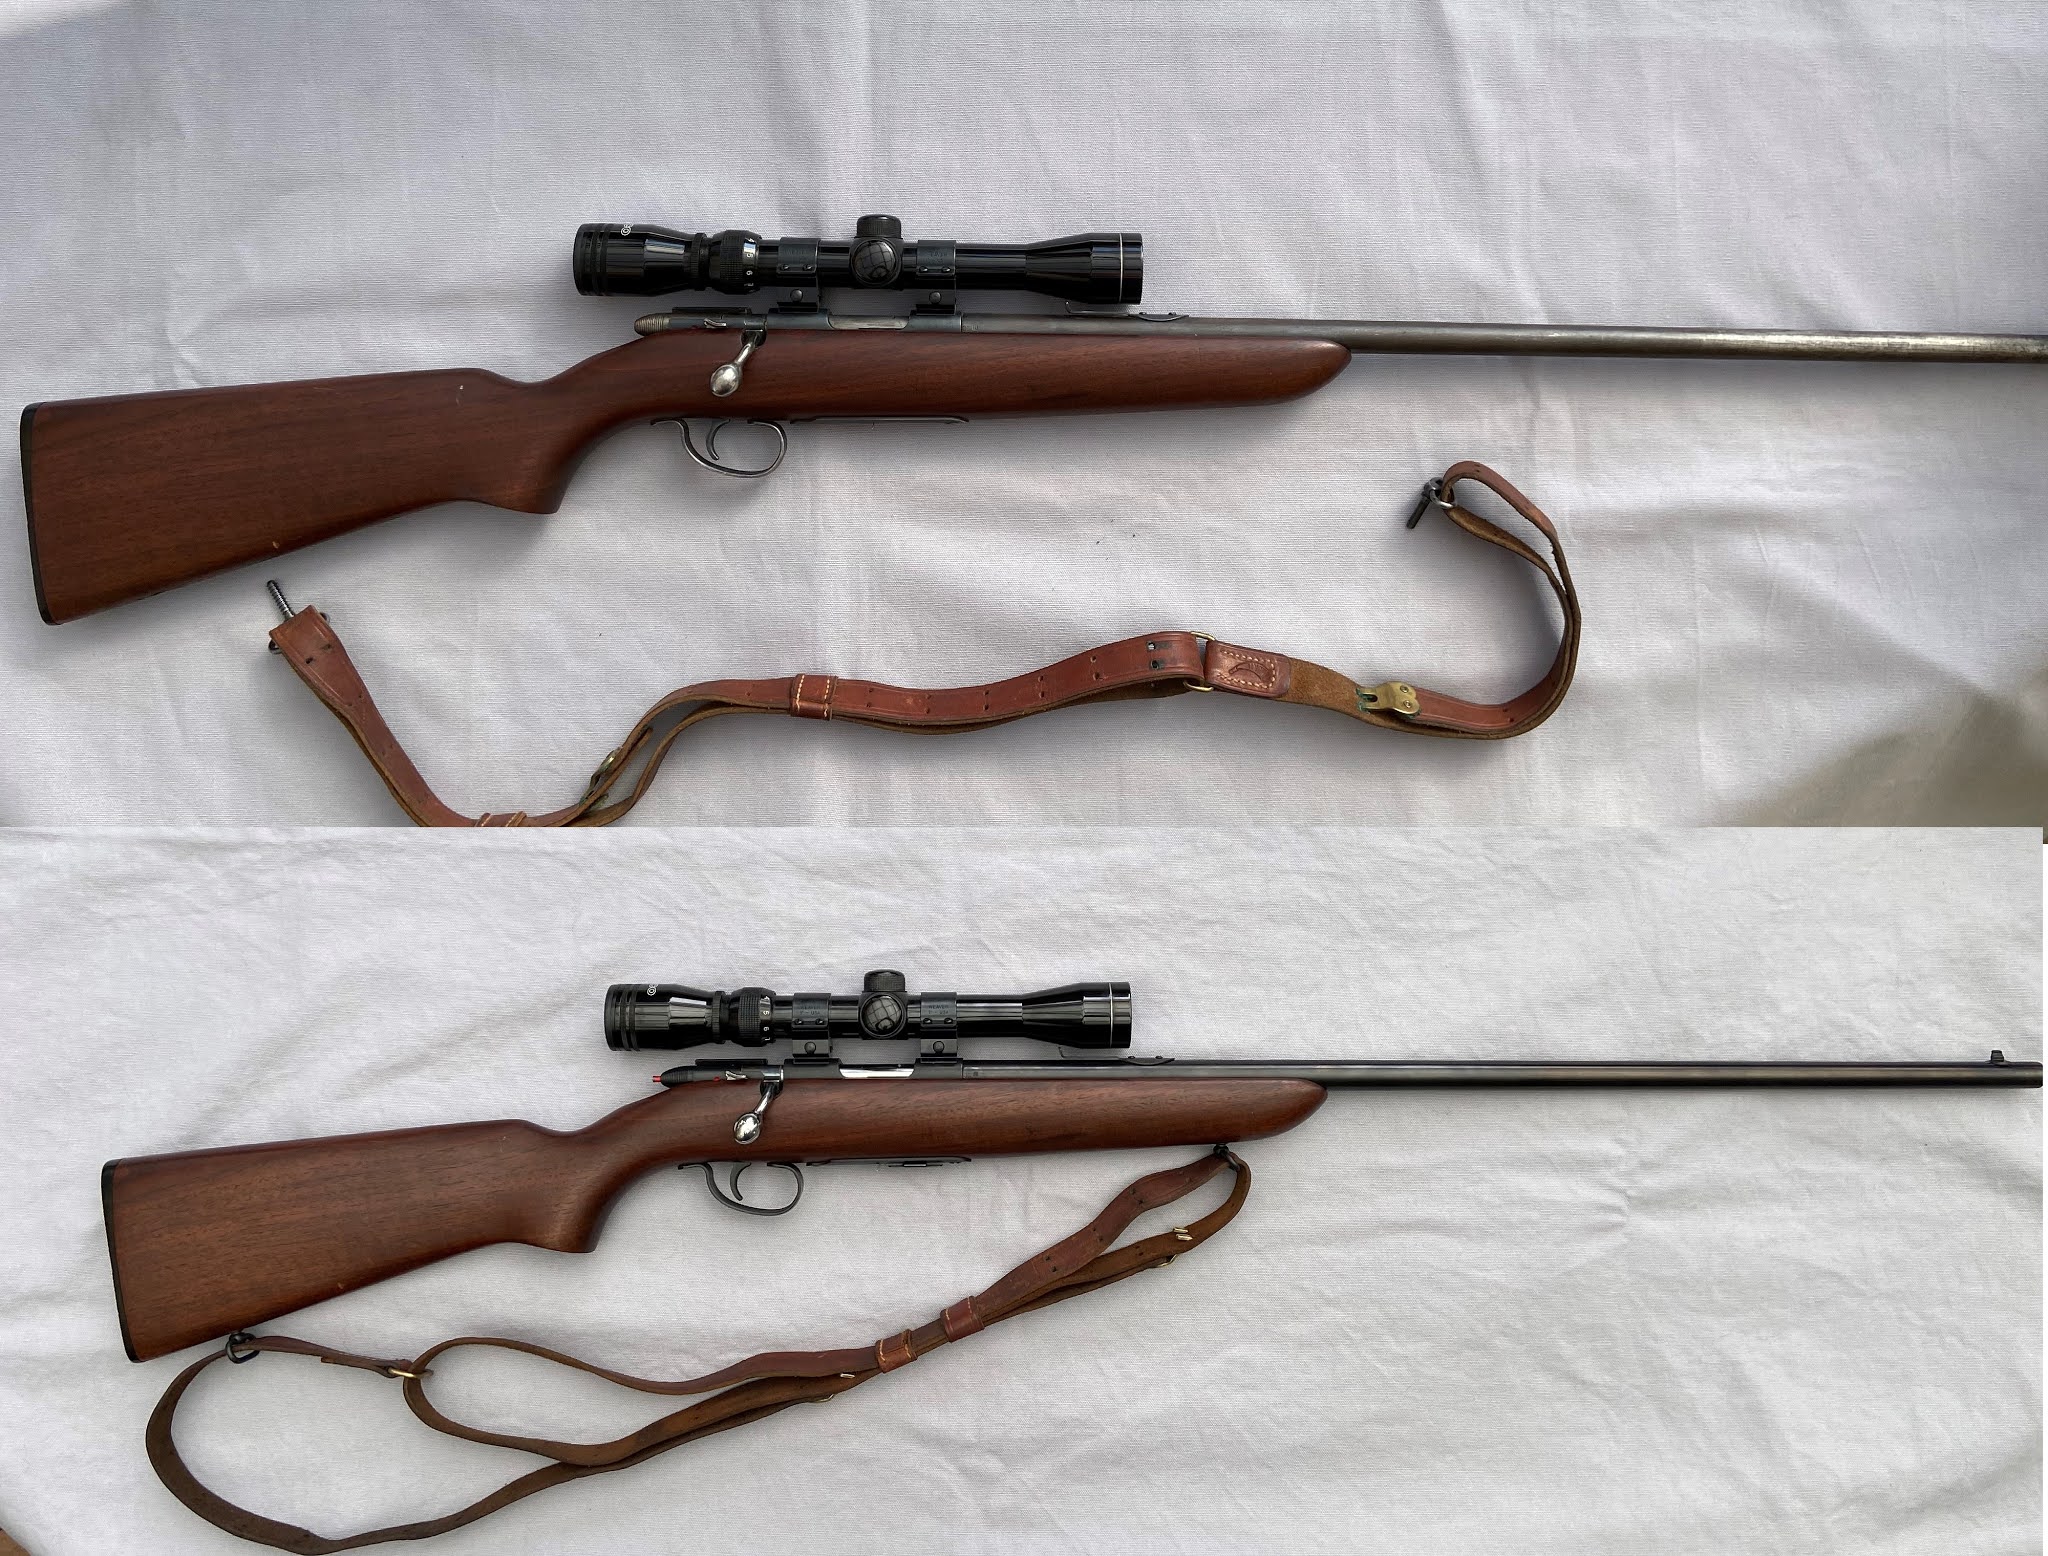
Finished, I believe we accomplished our goal of refinishing the rifle and mimicking the original finish.


Before and After photos


On to the next project!
very nice work
ReplyDeleteWow great job on this restoration love your work. Just found your blog now I'm binging all your restorations. Thank you so much for what you're doing. Love the content you are a gentleman after my own heart. I also have been doing this for years just never thought of posting it. Keep up the great work can't wait for the next one....
ReplyDeleteGun Doc, if you are interested we could post your work here, you do the documentation, of course you would be credited.
Delete