
We originally added a slip on Pachmayr recoil pad, not because of the massive recoil generated by the .22 long rifle, but because the original butt plate was missing, the butt stock was already damaged and I wanted to protect what was left. It made for a very long length of pull, but my son was a trooper and found a way to shoot it anyway.
I figured I would get to it someday......
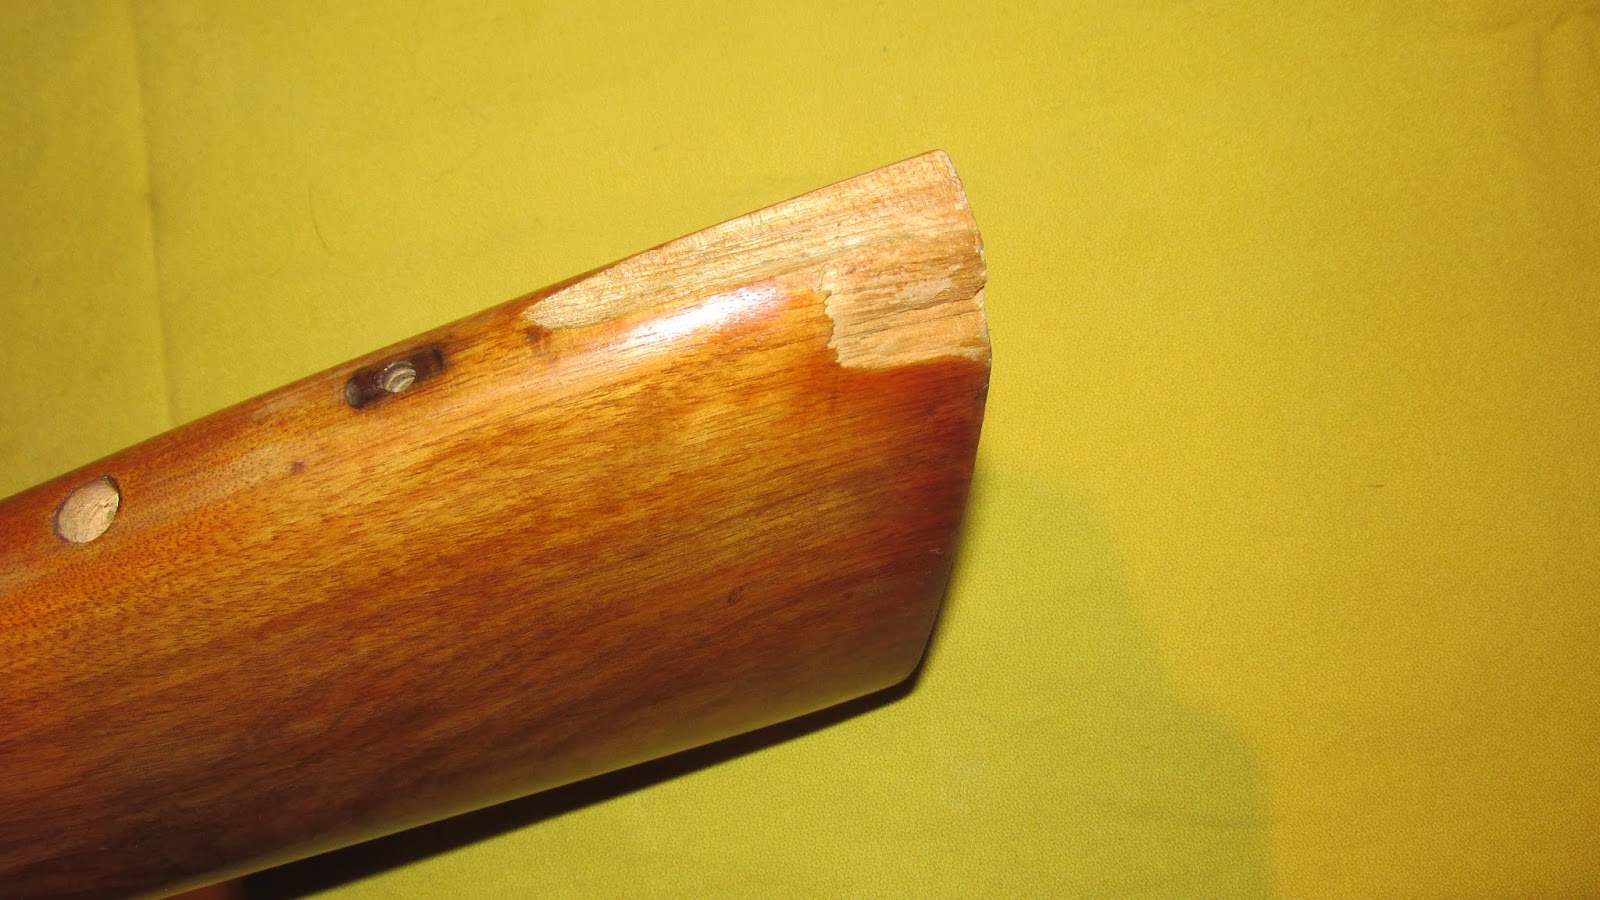
Someday is here. The stock is a blond color, probably birch or beech wood. I would like to stain it a walnut color. At the same time I will fix the back of the stock. Here is how the gun looked like before I started.

The Marlin Model 81-DL rifle was introduced in 1941 and manufactured up until the start of WWII. Model 81 production was resumed in 1945 and continued until 1964.
The gun has a 24" barrel, tubular magazine that holds (18) .22 LR or (25) .22 Shorts. The DL in the model number stands for Deluxe, which means the gun came with a rear peep sight and sling swivels.
Marlin did not put serial numbers on their .22 rifles prior to 1968, so that means if you want to find the build date you have to do some research. This is what I found:
Sometime in the late 40's/early 50's Marlin changed the trigger guard material from steel to plastic. In 1954 they switched from standard rifling to Marlin's trademark Micro-groove rifling. In 1960 they added an 11mm groove to the top of the receiver for scope mounting.
This gun has the Micro-groove rifling and it has a plastic trigger guard but it does not have the grooved receiver. This means that this gun was built sometime between 1954 and 1960.
This Marlin ad is from 1949 and appears to show the plastic trigger guard:


Here is the damage to the stock:
On .22's a short length of pull helps with new shooters and you need not worry about getting a "Weatherby Eye" from the scope, since recoil is pretty much nonexistent.
I will cut some off the butt stock before adding a pad, bringing the LOP to around 13". This would also remove some of the damaged area as well.

For $3.50 I scored a pair of large (12-13) flip flops, they often have sales on these for $1 (maybe I should've waited until the end of the season??). They have a smooth side on the top and a "grippy" side on the bottom.
A recoil pad has three jobs:
- Provide cushion from recoil (not an issue here)
- Provide a good surface to mount the gun to your shoulder
- Protect the wood from damage

With the addition of the flip flop, the LOP will be a bit more than 14 1/4". I'll take 1" off the stock and make it 13 1/4". I'll use the cut-off portion to make the repair.

We need to cut the stock, repair the chip, sand, stain and refinish the stock.
Before marking the line to cut the stock I checked the pitch angle (the angle of the butt relative to the comb). As you can see this gun has a positive pitch angle.

This may be important on a shotgun or heavy recoiling rifle (setting a positive pitch will help tame recoil), but on this gun that is not a concern, also it will be fired by children and women (besides myself) so I am not concerned with making it fit me.
I also checked the comb angle and it has a slight upward angle, which is not all that uncommon on a rimfire rifle.
I decided to cut the butt at 90 degrees to the comb. I tapped the stock (to prevent the saw blade from ripping chips out of the edge) and marked the line. I will be using a compound miter saw, so cutting a 90 degree angle will be easy.

Now that we know what we want to do, onto to dis-assembly and repair in part 2
No comments:
Post a Comment