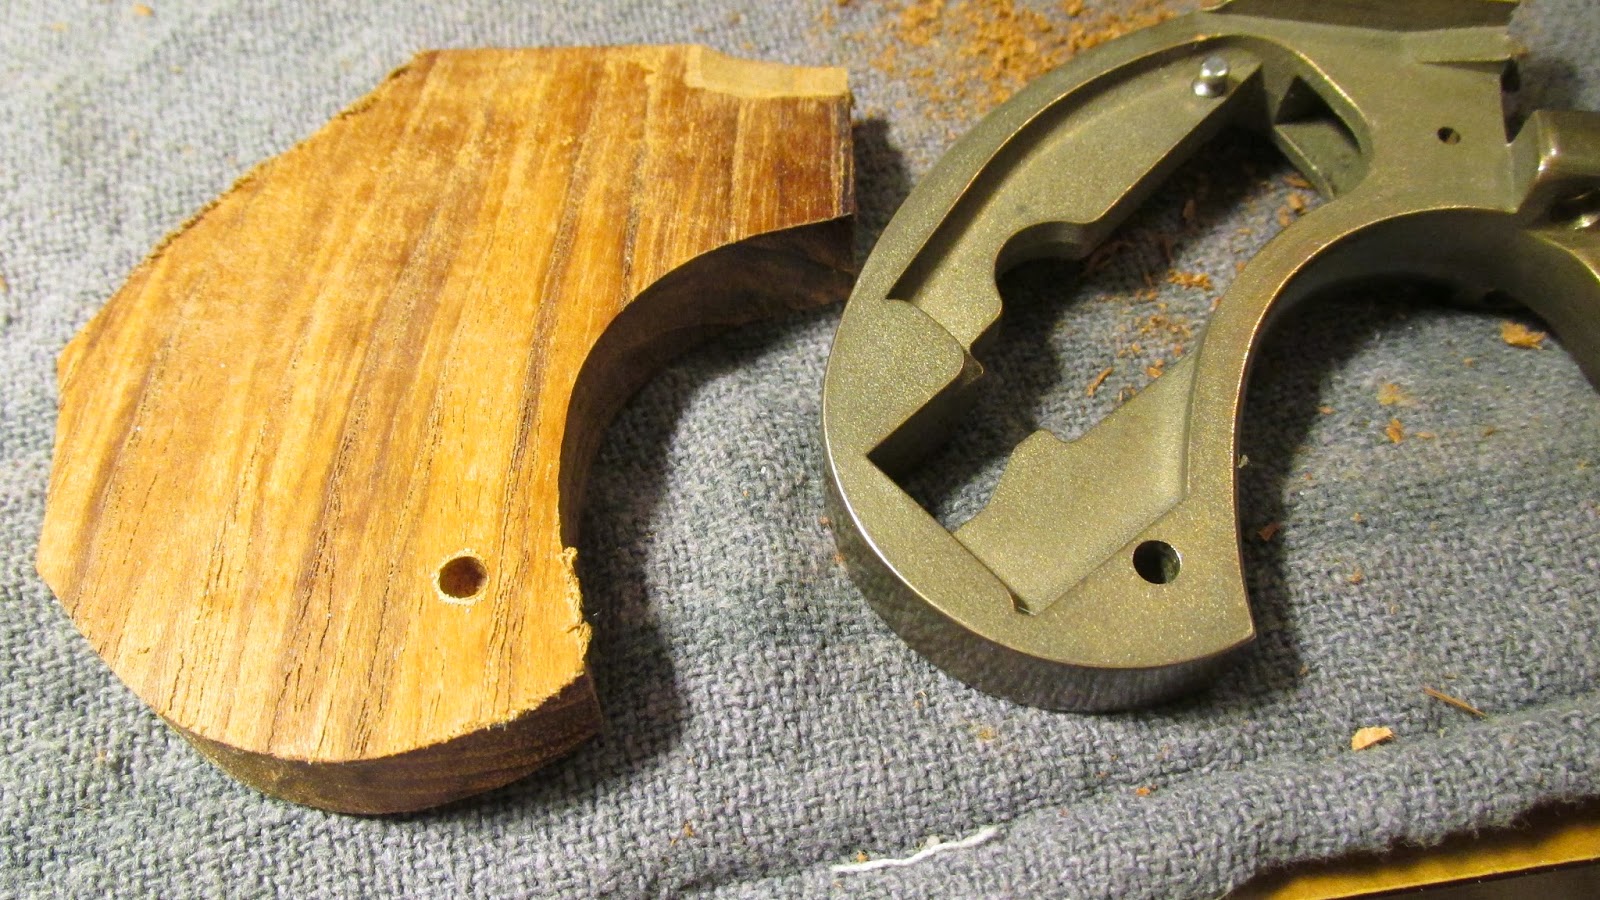
I decided I wanted to make them from some Teak wood I bought a while back.
This piece of Teak has some great colors: golden brown with tan and auburn streaks.
Teak is similar in grain structure to walnut, but is slightly denser and has great resistance to moisture, wear and rot.
The grip frame came naked, I purchased a trigger return spring perch and grip locator pin from Midway USA.
I installed the trigger spring perch first
I also bought this grip screw and escutcheons from Gun Parts Corporation.
I traced the original grips onto the teak wood making sure the grain runs vertically.
I also cut some scales for a dagger to match the gun.
This coffin handled boot dagger will be the perfect accessory to go with my new cowboy Vaquero six shooter.
I borrowed my neighbors band saw to cut the grips rough shape, leaving a little extra in case I needed to make adjustments on the fit
In order to fit the panels flat on the frame we need to remove some material at the top of the panel (see red circle)
I started using a chisel and switched to the dremel, much faster....
I then found a drill bit that would barely fit into the grip locator pin hole
Using the original grip panel, I figured out how deep the hole should go, I used tape on the drill bit to act as a stop.
The next step is to drill the holes for the grip screw. I needed to make sure that the grip screw would not interfere with the main spring/strut assembly.
I used this old Altamont grip panel that I got from the gun show for $1 (the matching panel is cracked)
I then checked to see how deep the escutcheon holes would need to be.
I guesstimated the depth and went a little shallow just in case, again since I don't have a set of drill stops, I used masking tape and a steady hand
They fit, but I had to drill them deeper as the screw was no where near long enough and I am planning on thinning the grips considerably.
I put the grip panels on and used the belt sander to get the shape closer to the profile of the frame
I used masking tape to protect the brass, the belt on the sander is an 80 grit, so it could make some nasty scratches
I could not use the belt sander on the inside of the grips, had to go old school with a rasp and file
I then started thinning the wood and rounding the edges, using the black plastic grips that came with the brass grip frame as a guide
This is what I was after, the profile is very close to the factory Qualite grips and feels good in the hand.
Now I will blend the contours ......then try to make the other side identical...
Once I had the grips close, I switched from the file to 220 grit sand paper, then 400, then 600....remember sand with the grain
The back strap got sanded along with the grips, once fitted to the gun's frame, I will polish the brass to a high shine
Once I was happy with the finish, I wiped the panels clean with acetone
The last step is the Tru-Oil, I rubbed in the 1st coat with my finger until it was dry. I'll let it sit overnight before adding the second coat
3rd coat rubbed in hard
I stopped at 3 coats, figuring that Teak has natural oils and is extremely resistant to wear and the elements....
I did add one thin coat to the back of the panels
Then I broke out the Brownells Stock Rubbing Compound to knock down the shine to a satin
I finished them off with a quick coat of Carnuba wax and they're done
Here they are on the gun:
I'll follow this post with one one the dagger that I made to match.


