
Part One
Part Two
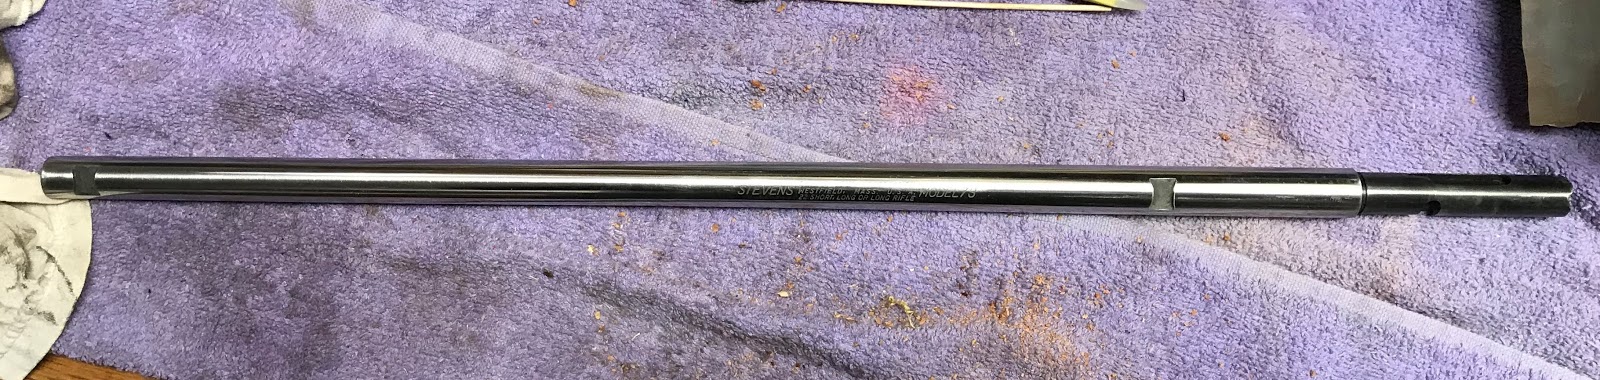
Now that the wood is done, we need to get the steel parts ready for bluing. I start on the barrel by removing the sights

Then I begin polishing with 100 grit cloth backed sand paper. I polish the metal both radially and longitudinally, alternating until the pits are nearly gone, then move up to the next grit.

This is 220 grit....

Finishing with 400 grit

Next we clean up the small steel parts
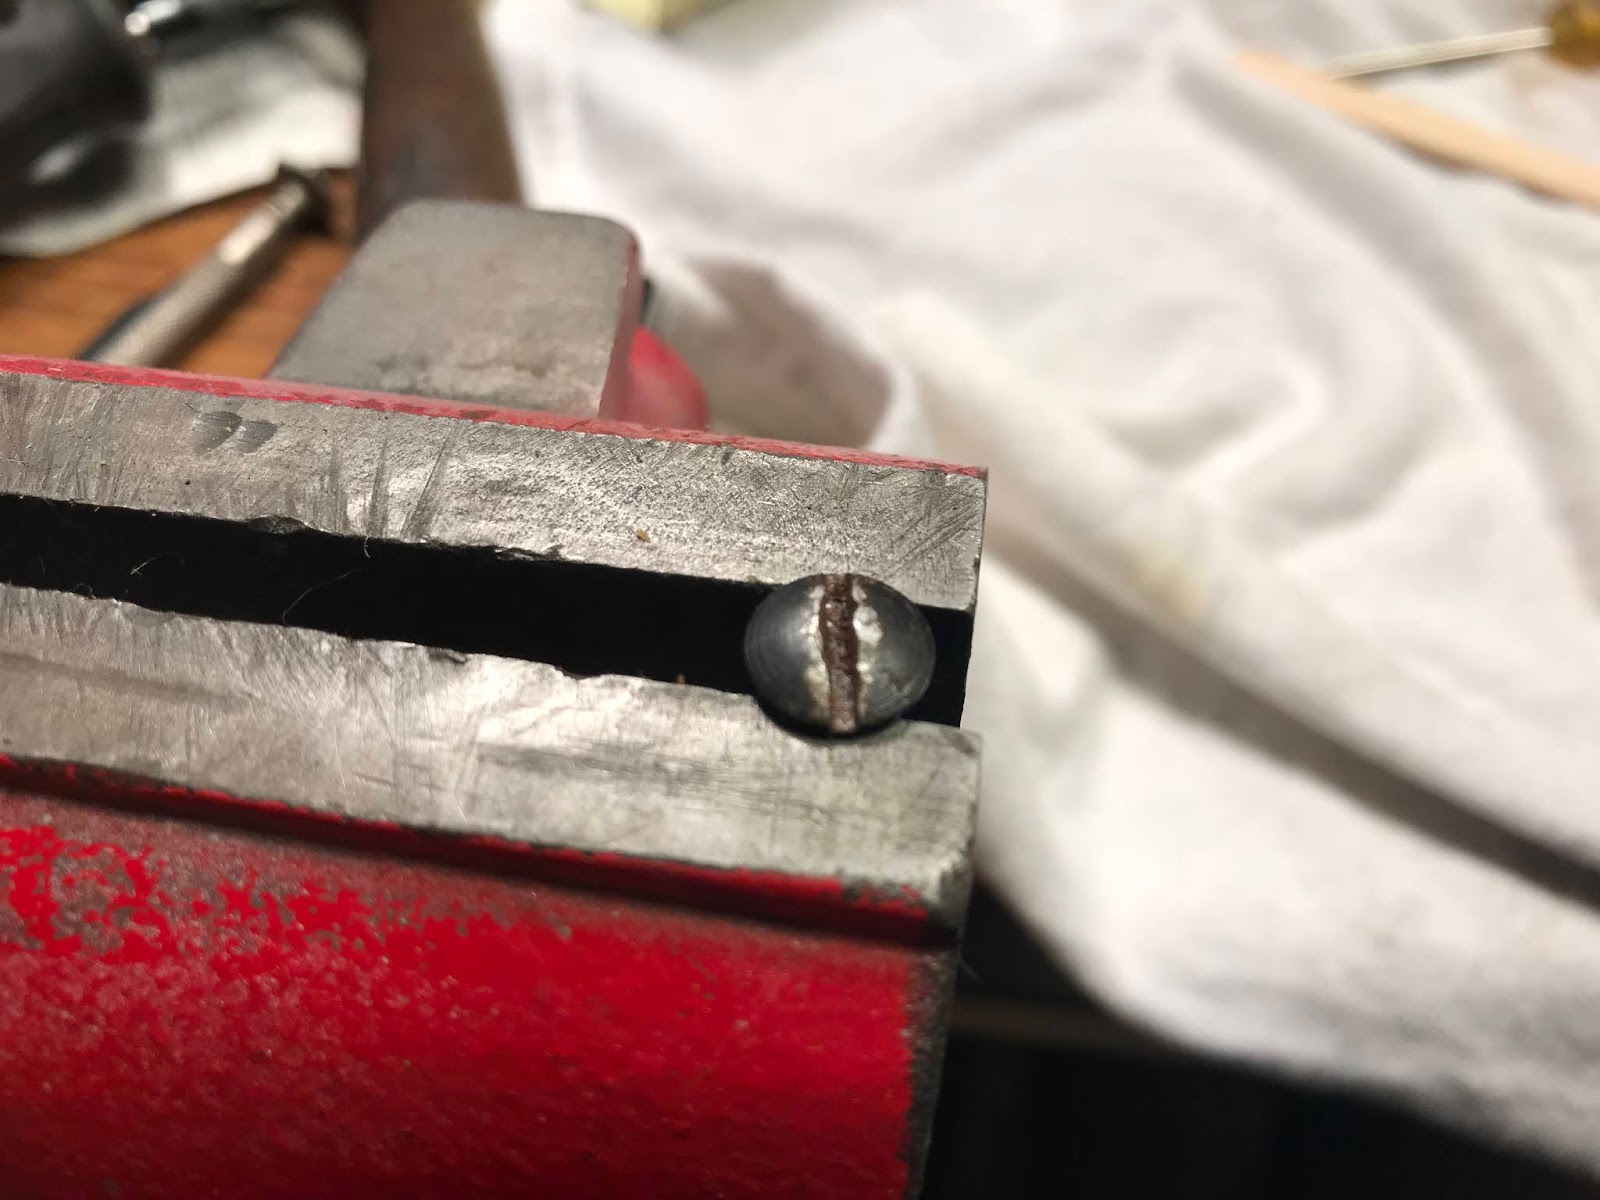
We'll start with the mangled take down screw

After taping up the threads, I put it in my vice and tapped down the distorted metal with a ball peen hammer
Then I use a needle file to clean up the inside edges

Then I chuck it into my cordless drill and clean it up using sand paper, finishing with 600 grit

I used the wire wheel on my bench grinder and sand paper to clean up the remaining small parts


Time to reassemble the bolt, the roll pin that held in the extractor and extractor spring was too short and was beat up, I replaced it with a new stainless 1/16" roll pin

After installing, I filed it down flush on both sides

The firing pin goes in a channel on the side of the bolt, it is held in place by deforming the metal with a chisel

I had to polish the aluminum surface inside the receiver housing, the barrel to receiver fit was very tight

Before final assembly I wanted to clean up the receiver and trigger housing with a fresh coat of satin black spray paint. Cerakote would have been better, but I am not going to spend $100 to Cerakote a $75 rifle.


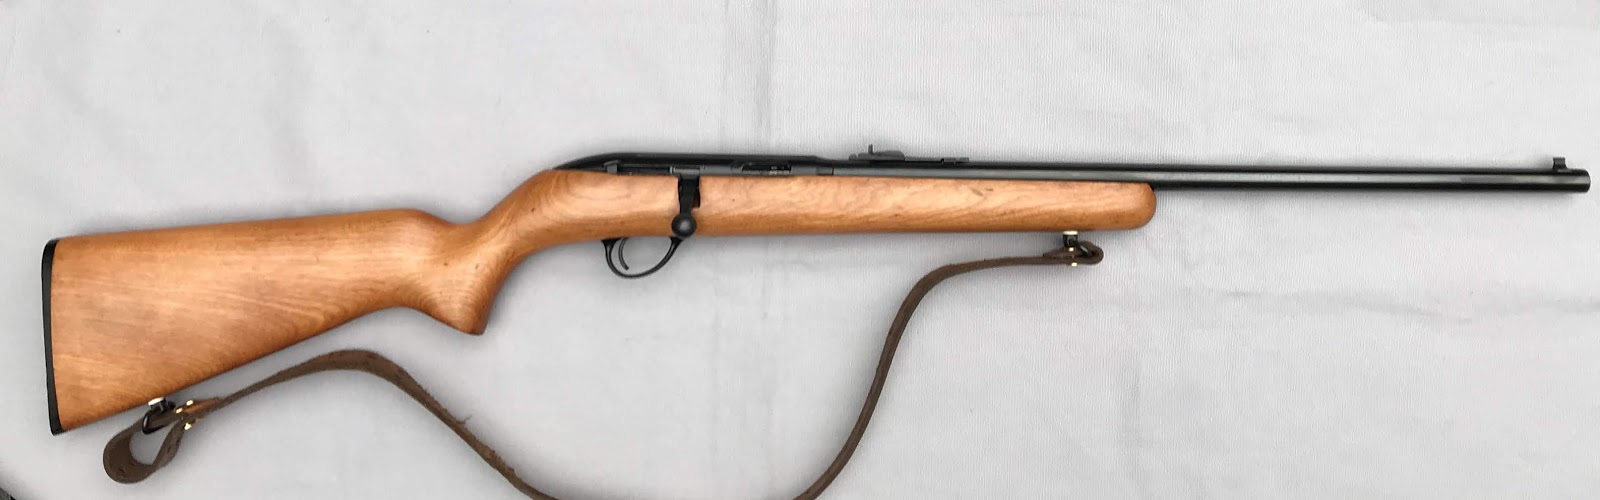
Finished


Before and after


I decided this thing needed a sling, I had this old leather belt that had two rows of holes punched along its entire length. So trimmed one end and ordered up some brass Chicago bolts.


Project Costs:
Rifle purchase price: $14.00
Used bolt: $36.00-$30.00 refund = $6.00
NOS extractor: $13.99
NOS firing pin: $20.95
Savage butt plate: $1.00
Butt plate screws: $0.50
Sling swivels: $2.88
Extra Bolt: $1.00
Sling: $0
Chicago Bolts: $2.46
Subtotal investment: $62.68
Extra Bolt sold: -$40.00
Total Investment: $22.68
On to the next project!
I'm putting together my grandparents old 73 and was wondering about barrel to recieve fit. It's very tight and even made some metal shavings when trying to take it apart. Any advice?
ReplyDeletealso, should the barrel be sitting flush with the body? my barrel is sitting just slightly above the the groove it should be in.
DeleteTo aid the installation, use a lubricant, gun oil or grease. The barrel should fit tight against the receiver and the notch should line up with the screw hole
ReplyDelete