
I did some more investigating on how the MkIII Troopers were built. The trigger, hammer and other parts were made from sintered metal, then case hardened. This means that you cannot hand fit any parts, once worn out, you would simply replace them. This design was intended to prevent the wear and subsequent maintenance experienced by owners of the Colt Python.
The owner of this gun had already replaced the trigger on this gun with a new or NOS one.The original one had a crack in the pivot hole.
The first step in any restoration (after the evaluation) is dis-assembly.

Colt revolvers are famous for being overly complicated. This one wasn't too bad. Also if you know your Colt revolvers you may not recognize these parts, they are quite a bit different from the classic colts like the Python, Police Positive and Detective Special.

for comparison, here are the internals of a 1973 vintage Colt Detective Special


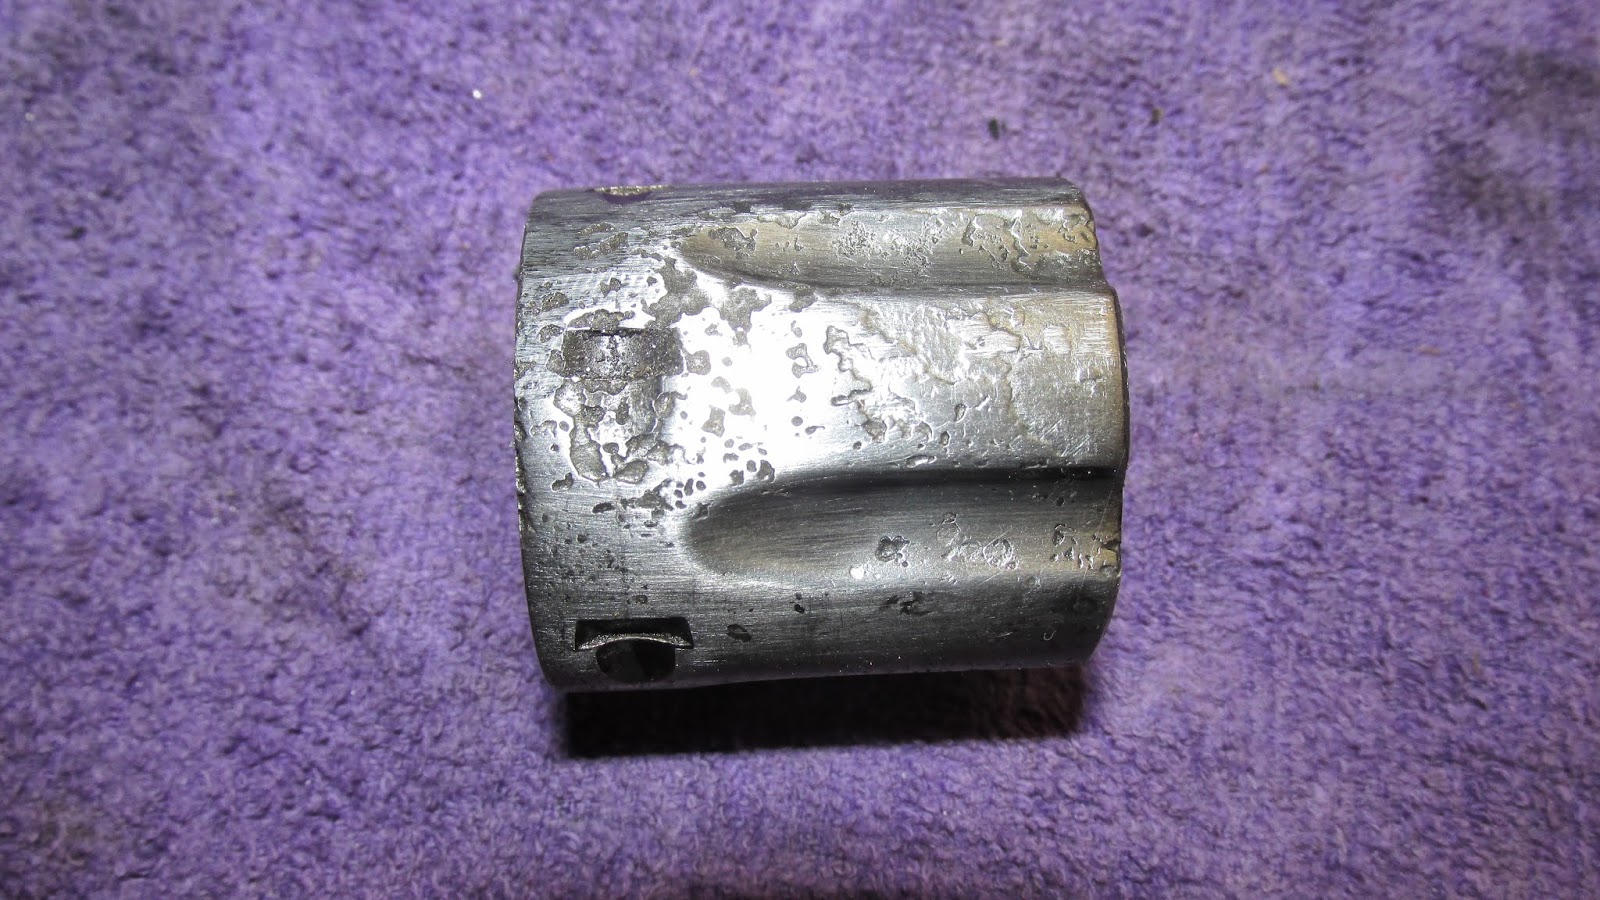
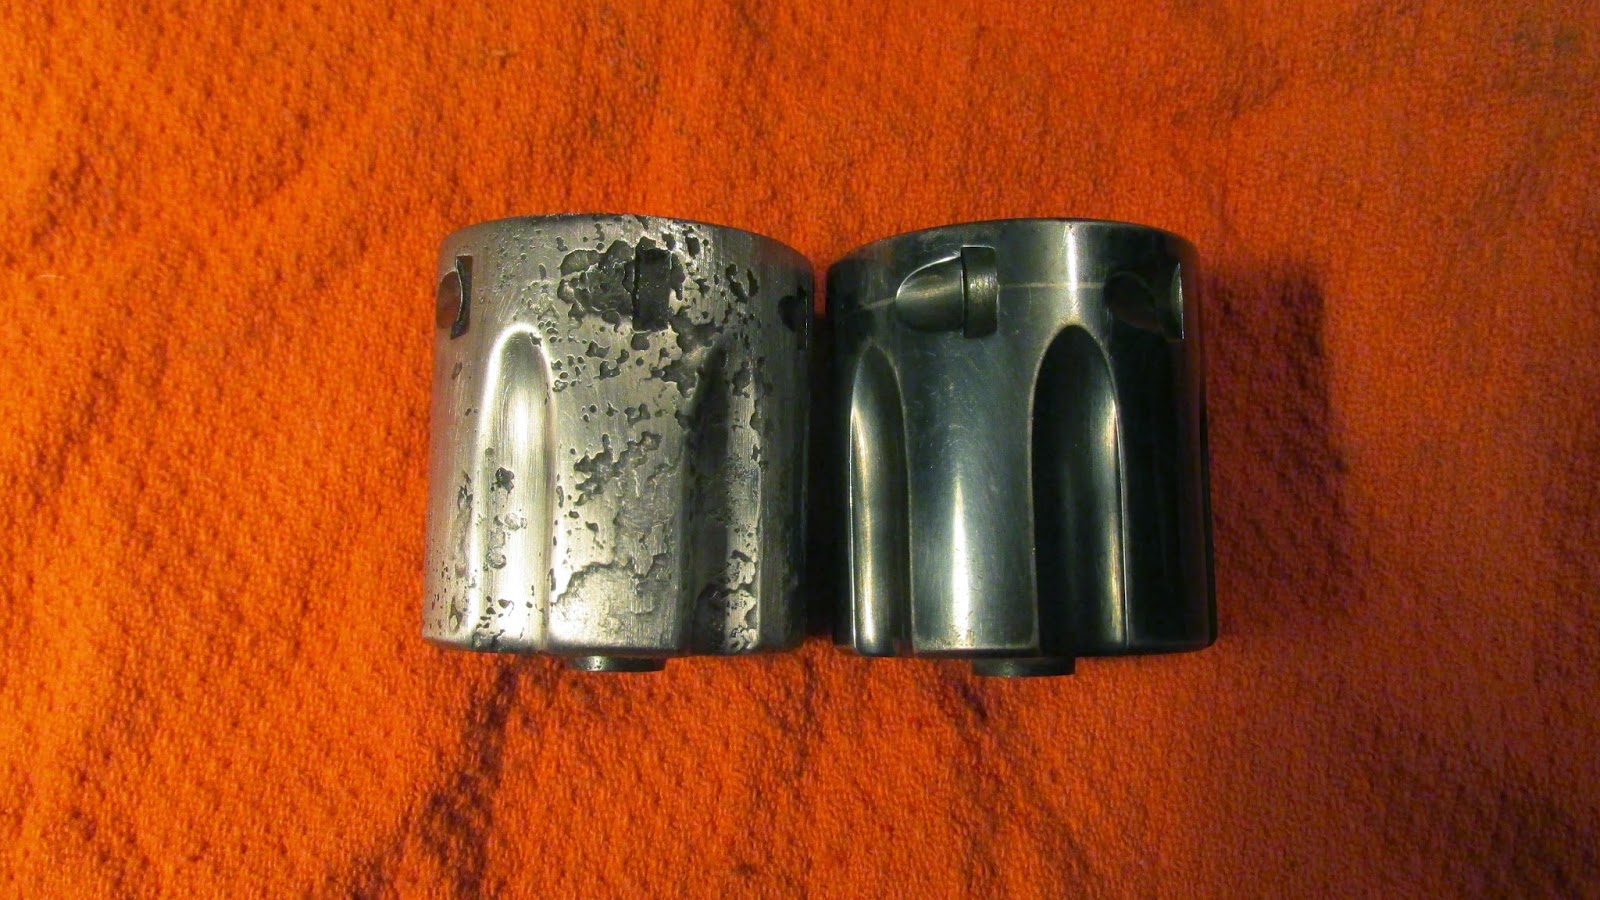
I discovered the pitting is just too deep. While attempting to remove the pits, I removed too much metal (in my opinion) from the cylinder stop notch. There is another notch that is so badly pitted that I think it will affect the lock-up and may render the gun unsafe to shoot. I think we should look for another cylinder.

This brings up the question: How much money should the owner put into this gun? After searching Gunbroker, I can safely say that spending $200-$300 on parts would be a safe investment, these guns sell for $600+ in good condition and $800-$1200 in very good condition.
Making some headway, I was able to get most of the pits out of the trigger guard...baby steps


Now I just have to find a cylinder


I was able to file out most of the pits, then sanded with 220 grit paper. The front part was sand blasted to give it a non-glare sight plane and to hide the small remaining pits


I mounted the side plate, I noticed that I will need to do some filing and sanding to get a flush fit.

No comments:
Post a Comment