See the colors of the screws on this Colt:
If you have ever seen a set of chromed header pipes that got really hot, you probably noticed the rainbow effect and the bright blue color:
Here is a chisel that was heated then quenched, you can see the same effect
Here is the color spectrum of heat tempered steel
You can see that to get a bright blue we need to get the metal right around 590 degrees. Too cold (removing from the heat too soon) and we'll get a purple color, too hot we will get a blue-green-gray color.
Also like Nitre Bluing you should not perform this on any part that has been hardened. Triggers, bolts, hammers etc.. have been heat treated and this process can take away the original heat treating.
The first step is to polish the screw or part. This is the old tang screw from my Winchester 1906 restoration (Father & Son project)
Wrap the threads with masking tape to protect them
Then chuck it into your drill and polish the head using sand paper and a soft wood (pine) board as a backer.
I started with 220 grit then went to 500 and then to the buffer, here is the 500 grit finish
And the "buffer'ed" finish
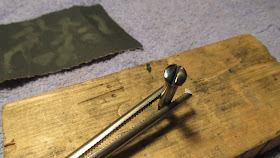
Then I placed the screw in the jaws of some forceps
Wash the screw thoroughly in acetone, mineral spirits, brake or carb cleaner
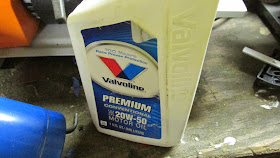
Before firing up the torch, you need to get a can or dish with oil to quench the screw. I have read that any oil will work, but some say to stay away from synthetic oils, not sure if that is true or not, or even why, but I had some conventional 20w50 motor oil, so that is what I used.
Then mount your torch in your vice and light it up.
Put the screw in the flame and watch closely for the metal to change colors. It will start by becoming less shiny, then a straw yellow color, followed by brown and then purple (spectrum above shows this).
You need to stop as soon as you see purple, as the peacock blue we want will follow immediately after the purple.
After quenching this was my 1st result. A brilliant and deep black. Which is great if I wanted to match my Hot Salts bluing job, but I was hoping for Peacock blue to accent the black color of the bluing job.
I was told that this was a difficult task to master. No worries, with this process you can sand, polish and start over. So back to 500 grit paper and the buffer and put it back into the flame.

This time I got almost perfect coverage, but the color was still not the blue I wanted. You can see the peacock blue mixed with some straw, purple and a little brown.
This is not an easy method, but it costs next to nothing in materials, and time is the only real investment.
I may try to master this process some time in the future, but I decided I want to give the Nitre Bluing a try. So I began buying the necessary equipment and supplies to try that.
References
Wikipedia


I'm assuming you're going with the Nitre salts from Brownells? Although I've heard of the torch/oil quench method, I've not had the luxury of time to play around with it. I use a Lee lead melting pot and the salts and have always gotten consistent results. With the information you've provided though, it kind of renews my interest in giving it a try.
ReplyDeleteRobert,
ReplyDeleteThanks for visiting my blog!
I do plan to continue experimenting with heat bluing, but have also moved on to try nitre bluing (using my own salts recipe)
http://tincanbandit.blogspot.com/2014/06/nitre-bluing.html
I've used this process quite a bit for screws. It works well. It all depends on how much heat and how much quenching in the oil you do. It's actually pretty fun to get a box of screws and experiment. Nice blog by the way.
ReplyDeleteHow did the other parts of the gun get that nice gray color
ReplyDelete