You wouldn't think that there would be much you could do to improve the bolt on a 10/22, but there are a few things. Here is a list of the mods we intend to accomplish:
- Polish all sides of the bolt
- Jewel the right side of the bolt
- De-bur and polish the firing pin, firing pin groove, the extractor and the extractor plunger
- Pin the firing pin in place to achieve precise/consistent hits on the cartridge rim
- Finally we will clean the bolt in an ultra-sonic cleaner
Here is what the bolt looked like before we started. It appears as though someone may have polished it before
You can see where the hammer has been riding against the bolt
The bolt face is dirty, but appears to have been polished before
The head space measured at just under .050", I have read that they typically run about .055" so this one may have been machined, which might explain why it was polished.
Optimal head space is between .044 and .047. Since this one is close, we will leave it as is for now.
One of the things often done to 10/22 bolts is installing a pin above the firing pin channel to prevent it from lifting up. By forcing the pin to travel in a straight line you end up with more consistent strikes to the rim, which is supposed to result in better precision.
Most of the aftermarket bolt makers have a pin pre-installed, like this one from JWH Custom (note the red circle)
You may ask why I didn't just buy one of their bolts with these mods already performed. I could have done that and stayed within the budget (it would have impacted our budget by an additional $60 or so), but the point of this built is to do it ourselves. After all, anyone can get out the credit card and buy a custom rifle or buy the parts pre-made.
The first step was to get the machinist vice clamped down and checked for level, then check to make sure I have the proper clearance to move the vice.
I left the level in place while drilling to make sure the bolt was not shifting.
Checking the clearance for the firing pin, we are using a carbide Hi-Roc, straight flute 1/16" drill bit
After drilling I installed the 1/16" x 1/2" long stainless steel roll pin (with the slot facing up, away from the firing pin).
Then I filed the end of the pin flat with the bolt
Next I began cleaning and polishing the firing pin. I de-burred and rounded the edges, I even polished the retaining pin hole
I'm not sure how much this helps, but it certainly can't hurt
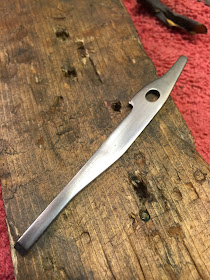
The extractor, sanded and polished on all sides, edges de-burred
The extractor plunger was chucked in my drill and polished to 2400 grit
I also polished the firing pin channel and extractor channel by wrapping 600 grit sand paper around my needle file
Then I polished the bolt on the buffer and put it back in the machinist vice so I could jewel it.
I use a 1/4" Cratex abrasive stick and Mother's polish, after jeweling the bolt I washed it down with brake cleaner and after drying, put it in my ultra-sonic cleaner with soap and hot water.
then re-assembled it
I wasn't happy with the depth of the "swirls" left by the cratex stick, so I started over. I bought a tube of valve grinding compound and a stainless brush for a Dremel, then I put some heat shrink on the brush to prevent the bristles from fanning out under pressure
This time the swirls are much deeper and defined
The charging handle was not the best looking one I have seen. I could have easily bought one for $30-$50, but some of those aftermarket ones add weight to the reciprocating assembly which can cause extraction issues.
Here is what it looked like when I started, you can see the machine marks in the back of the handle
After removing the machine marks I polished it to a 600 grit
Then I did the same to the front
After polishing on the buffer
The handle is made of steel, so I will need to keep and eye on it and polish it from time to time.
These parts are ready, time to move on


