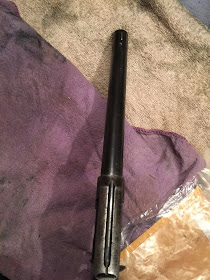
This is the 3rd installment of this project to restore a Colt New Service revolver.
See parts One and Two
When we last left this project we were working on getting the ejector rod bushing removed from the crane.
A friend of mine made me a spanner tool from a 1/2" bolt.
So I put the crane into the vice between two pieces of pine and heated it slightly with a torch, then added wax to the part to help break loose the bushing
The attempt was fruitless, the spanner kept slipping out of the notches. Time for plan B.
Here is plan B. I will pull the ejector rod out enough that I can cut the end off, when it retracts it will be lower than the bushing and I will be able to get a flat head screw driver on the tabs and unscrew the bushing from the crane
The plan worked, now I will unscrew the bushing
Eureka!
Before going further I needed to get the old barrel off and attach the replacement. You can see in the picture below the jaw marks from my bench vise, the barrel just spins in the vice and will not unscrew.
The proper way to do this is with a barrel vise, like this one from Midway USA
The barrel was going to be junked anyway, so I ground some flats into the side of the barrel
I then attached my home-built action wrench to the frame and but the barrel in the vice, this time we had success
See my write up here on how I swapped barrels on another gun using this tool/technique.
I installed the new barrel, but could not get it clocked all the way to top-center. I am ordering that barrel vise from Midway USA....it just happen to be on sale....
While waiting for the barrel vise to show up, I decided to fix the damaged area in front of the crane. When the previous "gunsmith" removed the barrel last time they forgot to remove the ejector rod and snapped it right off, in the process they also nicked the frame a bit
I tapped the metal back down with a hammer and then filed it flat again
I put the frame back in the home-made wrench and installed the barrel in the vise using the small oak bushings that came with it.
The barrel was spun to a perfect 12 o'clock position.
Now we can strip the old bluing and begin the polishing of the metal. This should go quick as there are no large pits to contend with, just some patina.
Stay tuned for part 4.


No comments:
Post a Comment