I found a great supplier on ebay (actually there are several good ones) that sells 80% finished knife blanks from around the world (including the USA).
This one is a boot dagger. I thought it would be a good one to start with. Here is the picture from the ebay auction:
Here it is on my work bench
I plan to use a piece of Bastogne Walnut that I bought at the gun show.
Bastogne Walnut is a natural cross between California English Walnut and California Claro Walnut. The wood is quite rare as it is not cultivated. It is prized for its beauty and density. The piece I have is not especially beautiful, but I chose the end with some wave to the grain.
After cutting the two pieces, I roughed them out close to the outline of the tang and used two part epoxy to glue them to the tang.
You can see the .22 cases in the background. I plan on using them to line the lanyard hole. I will drill the hole just so the .22 shell will fit, cut the rim off, chamfer the hole in the wood and then flare the .22 shell into the chamfer.
After the epoxy had cured I started rasping and sanding (by hand) the handles down.
While sanding I noticed something was off, I removed the knife from the vice and discovered the epoxy had not cured. The epoxy I used was the dual tube self-mixing type (see below). I think the "self-Mixer" didn't get the ratio correct, either that or this is not very good epoxy.
I'll do some research into what kind of epoxy the pros use and source some.
Turned out the epoxy was not mixing equally, so I squirted it onto a paper plate and mixed by hand. I cleaned up the surfaces again and fitted the .22 mag shell casing
The marriage of wood and metal is complete!
After gluing I had epoxy squished out and the wood/metal fit needed to be sanded again. I also needed to trim the .22 mag shell
I used my dremel to trim the .22 mag case down close to flush
This is the el-cheapo belt/disc sander I bought for making knives. If I end up doing more of this I'll buy a better quality one.
The sander made quick work of the epoxy/metal/wood sandwich
Here is a close up of the wood after sanding and cleaning with mineral spirits
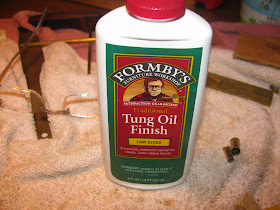
I decided this time to use Tung Oil rather than Tru-Oil, I wanted to experiment with Tung Oil and see what results I could get.
First coat of Tung Oil, I put a bunch on, wiped across the grain, let it set it a bit, then wiped off the excess. I will scuff lightly tomorrow, then add another coat, then repeat 5 or 6 times.
Another road-block. I discovered that the Formby "Tung Oil Finish" is not real Tung Oil. I gave it two applications and the second application would not dry, even after two weeks.
So I sanded it back down and tried a different product. This was recommended by another gun restorer on one of the gun forums: Minwax Helmsman Spar Urethane
The stuff sprays on and can be used indoors (or outdoors). Two applications was all that was needed. I buffed it with a 0000 steel wool pad and it looks great!
References
http://www.thinwood.com/home/species-walnut/bastogne-walnut


No comments:
Post a Comment