Part 1
Part 2
Now that we have the stock ready it is time to start on the metal.
Disassembly is often a challenge on the model 60 as the barrel is pressed in and held in with a cross pin. I have read many online forum threads where people say it is impossible to remove the Marlin barrels. The secret is a little bit of heat and some candle wax. Heat up the receiver (which is aluminum) and it will grow in size away from the steel barrel, then touch a candle to the junction, the wax will seep in and break the mechanical bond. I have removed three model 60 barrels this way.


After a through cleaning, the micro-groove rifling is visible again.

I contacted Black Hammer Arms (aka "The Cerakote King of Tacoma") about applying some Graphite Black to the receiver. After getting the receiver to him I started on the barrel and other parts.
I removed the old bluing and the little bit of rust with some naval jelly


Then I start polishing with sand paper, the shadow you see around the roll marks are due to the metal being raised around the marks. When the metal is indented, it has to go somewhere, kind of like the rim of a crater. If you don't remove the rim, a shadow will show through the bluing.

Here we are at a 2000 grit finish, ready for bluing


I happened to be bluing some other parts for another project, so I put the barrel and magazine band in the tank. The steel outer magazine tube will not be used, so I didn't bother rebluing it.

While waiting for the receiver to come back from Cerakoting, I cleaned up the internal parts


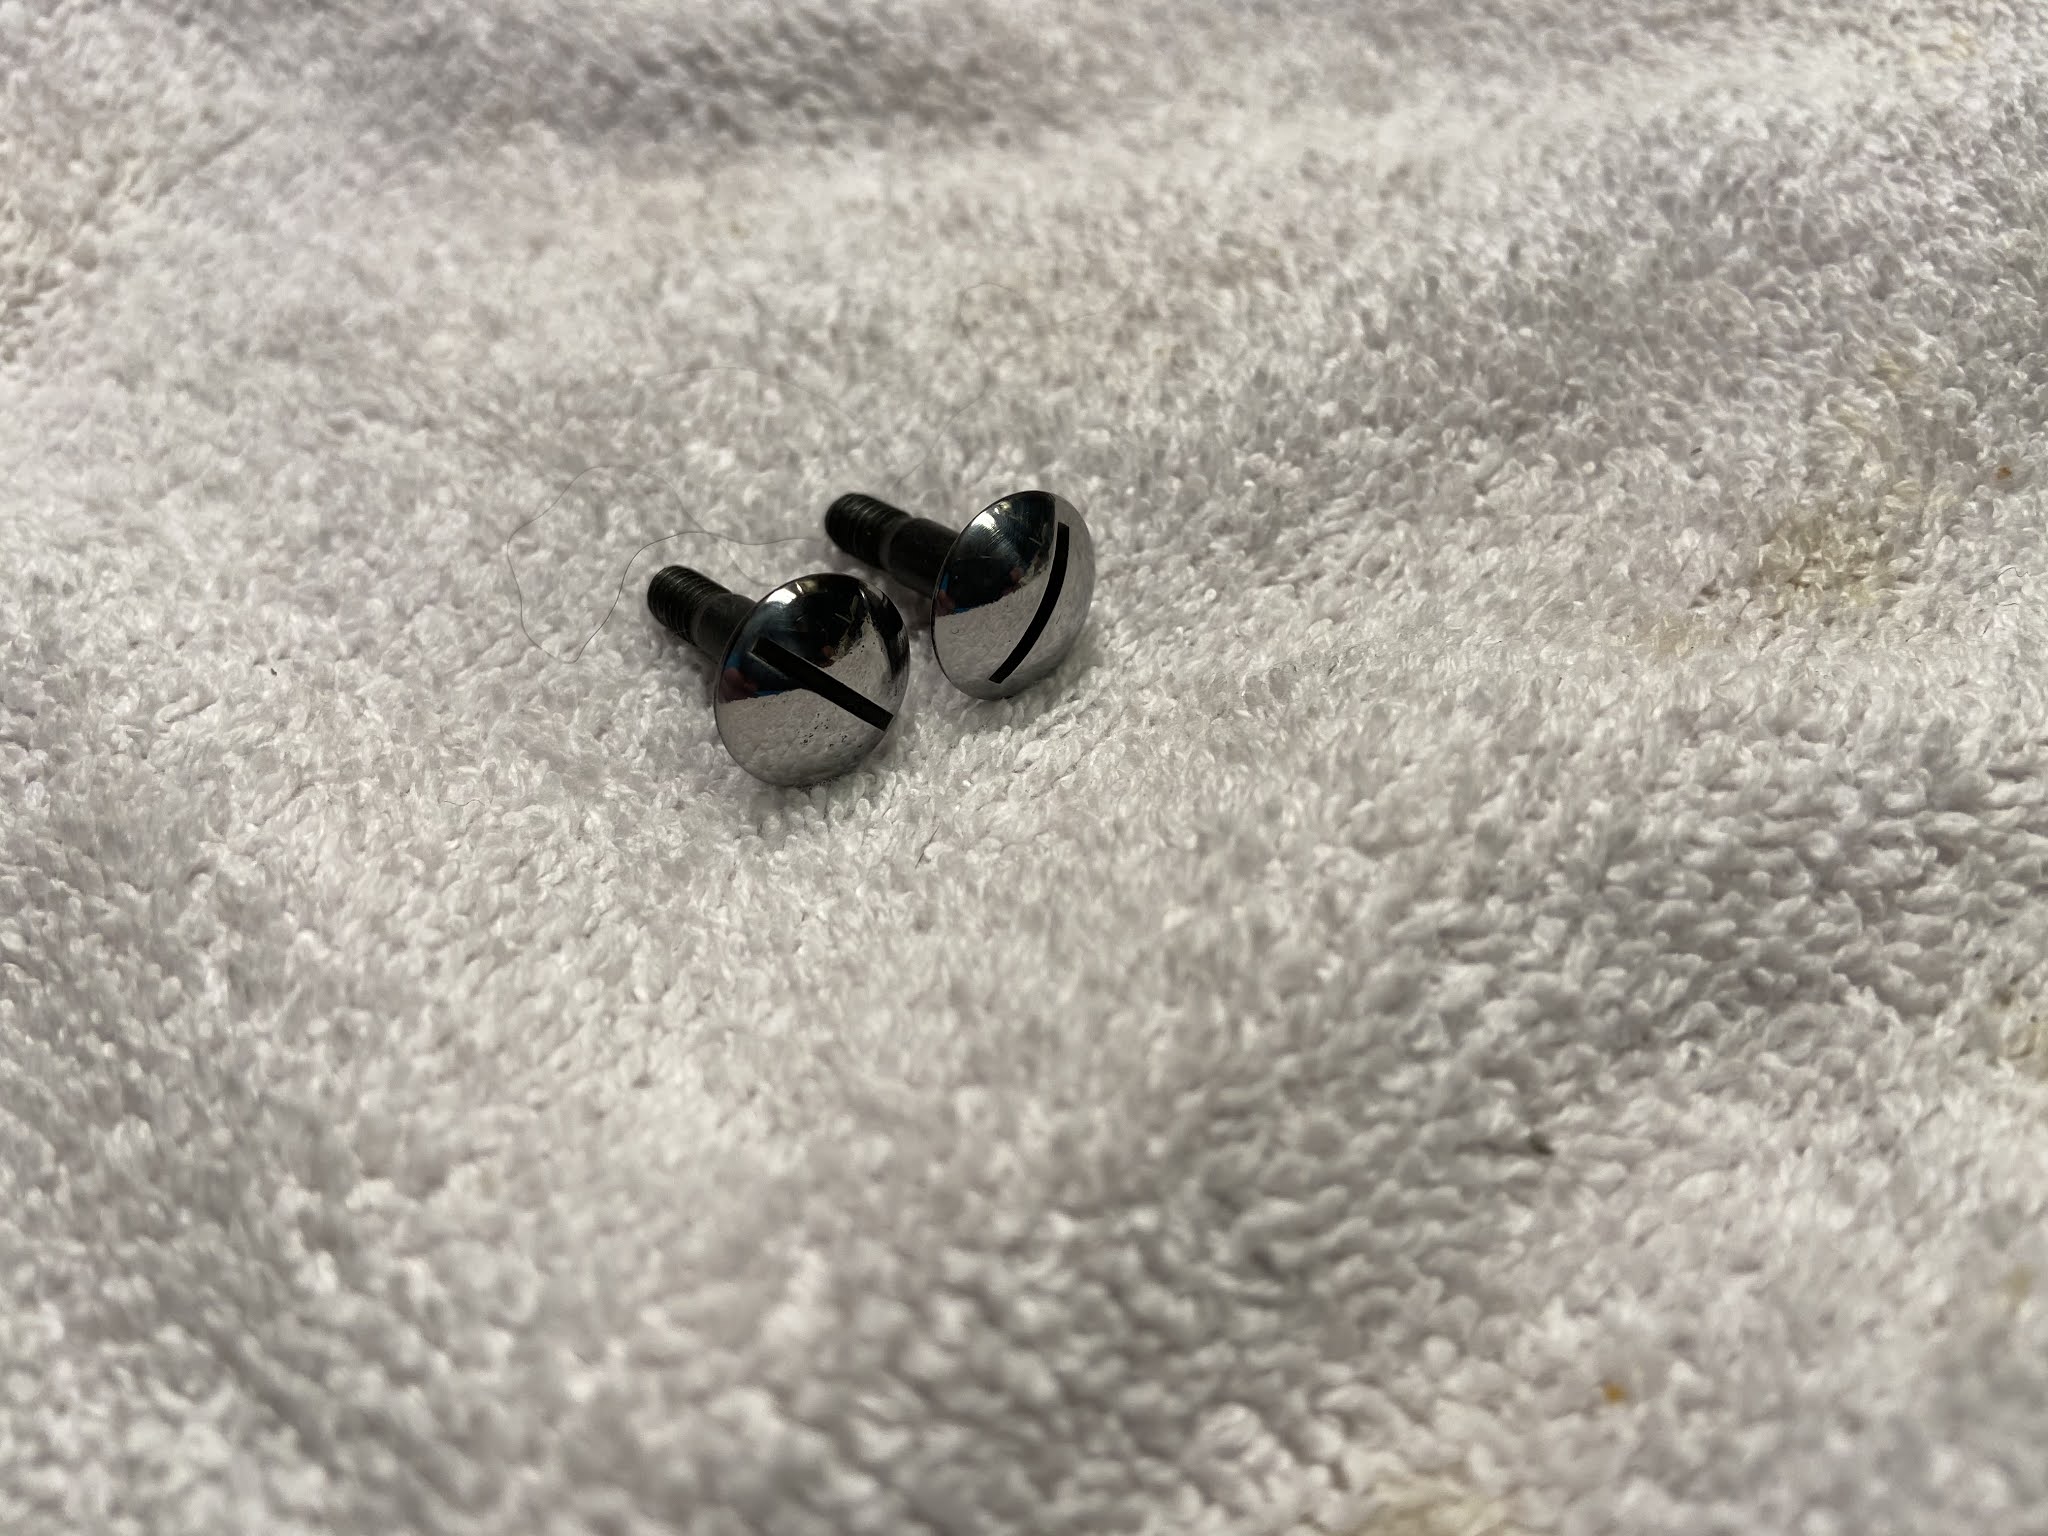
The take down screws (I had two of them) will get a high polish finish. I accomplish this by wrapping the threads with tape and chucking it into my cordless drill, then use sandpaper to clean it up, followed by some work on the buffer.
I do the same to the magazine cap.

The stainless charging handle also gets shined up

The hammer was in need of help, if we want a smoother trigger pull, we will need to smooth out the engagement surfaces. It still amazes me how the most important surface on a gun is often the roughest...so I broke out my stones and oil and went to work.
If doing something like this yourself, remember to go easy, check your work often. You do not want to round off the notch or remove too much material or the gun could become unsafe.
If you are in doubt, have a trained gunsmith do this for you....or just buy a new one (no guarantee the new one will be any better though).


I also polished the surface that engages the bolt

I noticed the feed throat had some corrosion on it, these are made from a zinc alloy and then chrome plated. I could have just polished the areas where the chrome had flaked off, but new ones are less than $20. I ordered a new one, while I was at it, I ordered a new, factory recoil spring and buffer.

I thought it wise to upgrade the rest of the internals with some new components.
I ordered a Spring Kit from MCarbo, the kit included new hammer spring, trigger spring, sear spring & disconnector spring. The kit is advertised to reduce trigger pull by 35%.
I can't recommend these guys enough, their stuff is 100% American made, comes with a lifetime warranty and the company is veteran owned and operated.

I will also be replacing the original E-Clips with these stainless steel ones that I sell on ebay.

I got the remaining small parts blued, including the bolt release lever.....so time to put the action together.

I started with the disconnector spring, the MCARBO video shows how to install this properly

The goal is to get the spring to sit flat against the side plate

Following the rest of the video, everything is in its place ready for the other side plate

but first I needed to install the bolt release lever on the other side plate

Everything is buttoned up and ready for business.

Stay Tuned for Part 4
No comments:
Post a Comment