Part 1
Part 2
Part 3
Now that the stock is fitted and finished, time to work over the metal. If you remember in part one I questioned the Century Arms International stamp as possibly indicating this gun was imported

Initially I was intrigued by the stamp, which appeared to be an import mark. Century Arms International is a known importer of firearms and I wondered if maybe this gun (due to its 1916 birth date) had served in the Great War. I sent an email off to Century posing the question. All they could tell me was that they only only stamp the guns they import. So this gun was imported from somewhere by Century.
That could still mean this gun served in WWI, although I have yet to find any evidence that Marlin shipped anything besides the M1895 Browning Machine Gun to the war effort.
So this could just be a rifle that spent all or part of its life in Europe or perhaps even Canada (a more plausible explanation) and was shipped back to the U.S. after 1968 (when the import stamps became a requirement).
Also in case anyone is interested, it is perfectly legal to remove an import stamp. You must however keep the importers serial number (if it exists, which on this gun it does not).
I'll start by removing the forearm, but I had a screw that would not budge and the slot was so shallow that a screw driver bit would not stay seated, so I drilled it out:

Now I will have to drill it for a small easy out bit

No damage done to the forend cap, although it is so pitted, we may consider replacing it anyway

I removed the tenon and found 100 years worth of oil, solvents and dirt

I probably should have shown a picture of this earlier. The bore is dark and pitted, but the rifling is distinct so there maybe hope for it

The muzzle needs some help

The receiver sight and tang screws did not want to budge either, some heat (provided by a torch) and some candle wax loosened them up

more gunk and rust under the rear sight

The front sight will need to be replaced, the bead is gone and it appears to have been used as a cleaning tool for the wood chipper....

I started with the muzzle, I used a file to get the dings and gouges out, then sandpaper (to a 400 grit finish) to make it look respectable again.

I then cut a new crown using a brass bolt and valve grinding compound.

Much better, I'll smooth it out some more before bluing, but at least the crown is now uniform and the dings are gone

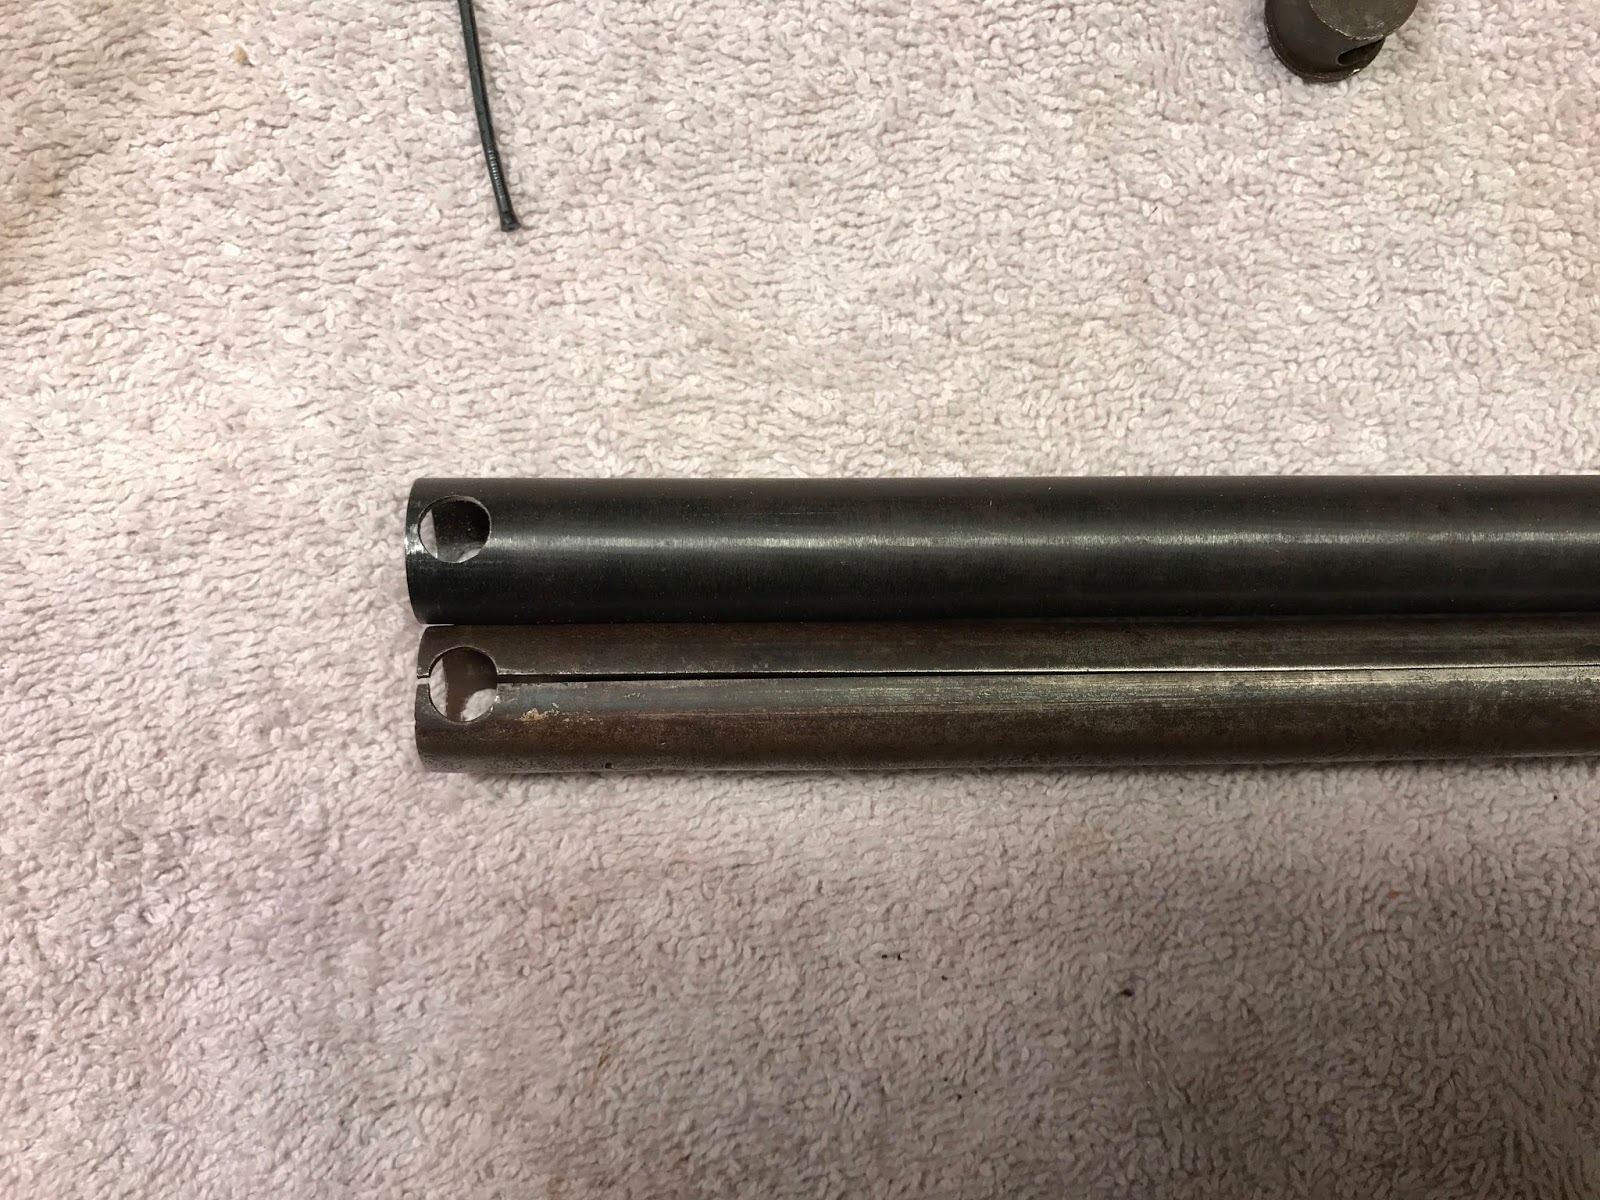
The magazine is toast, the dent was severe enough to bend the tube and split it at the end


unfortunately this is a really long one, which you don't find on the modern versions of this gun (model 336). It measures 25 1/8" and is approx. .642" in diameter

Thanks to Gun Parts Corp we were able to source a new magazine tube, just $22.05 + shipping....The diameter was perfect, but the holes were the wrong size (too small) and it was 3/4" too long, both items are easy fixes

I trial fitted the mag follower and end cap just to be sure....they fit like a glove

I enlisted the help of a machinist friend to drill the correct size holes in the opposite end of the mag tube:
He left them just a tad on the small size so I could hand fit them with a file. I started with the tennon end, then fit the screw


Then fit them both

It was time to cut the mag tube to length, so I used by dovetail jig, measure three times, cut once...

Hacksaws rarely leave a clean cut....

Some work with the file and everything is peachy, I even chamfered the edges to make sure nothing hangs up

Here is the part we cut off.
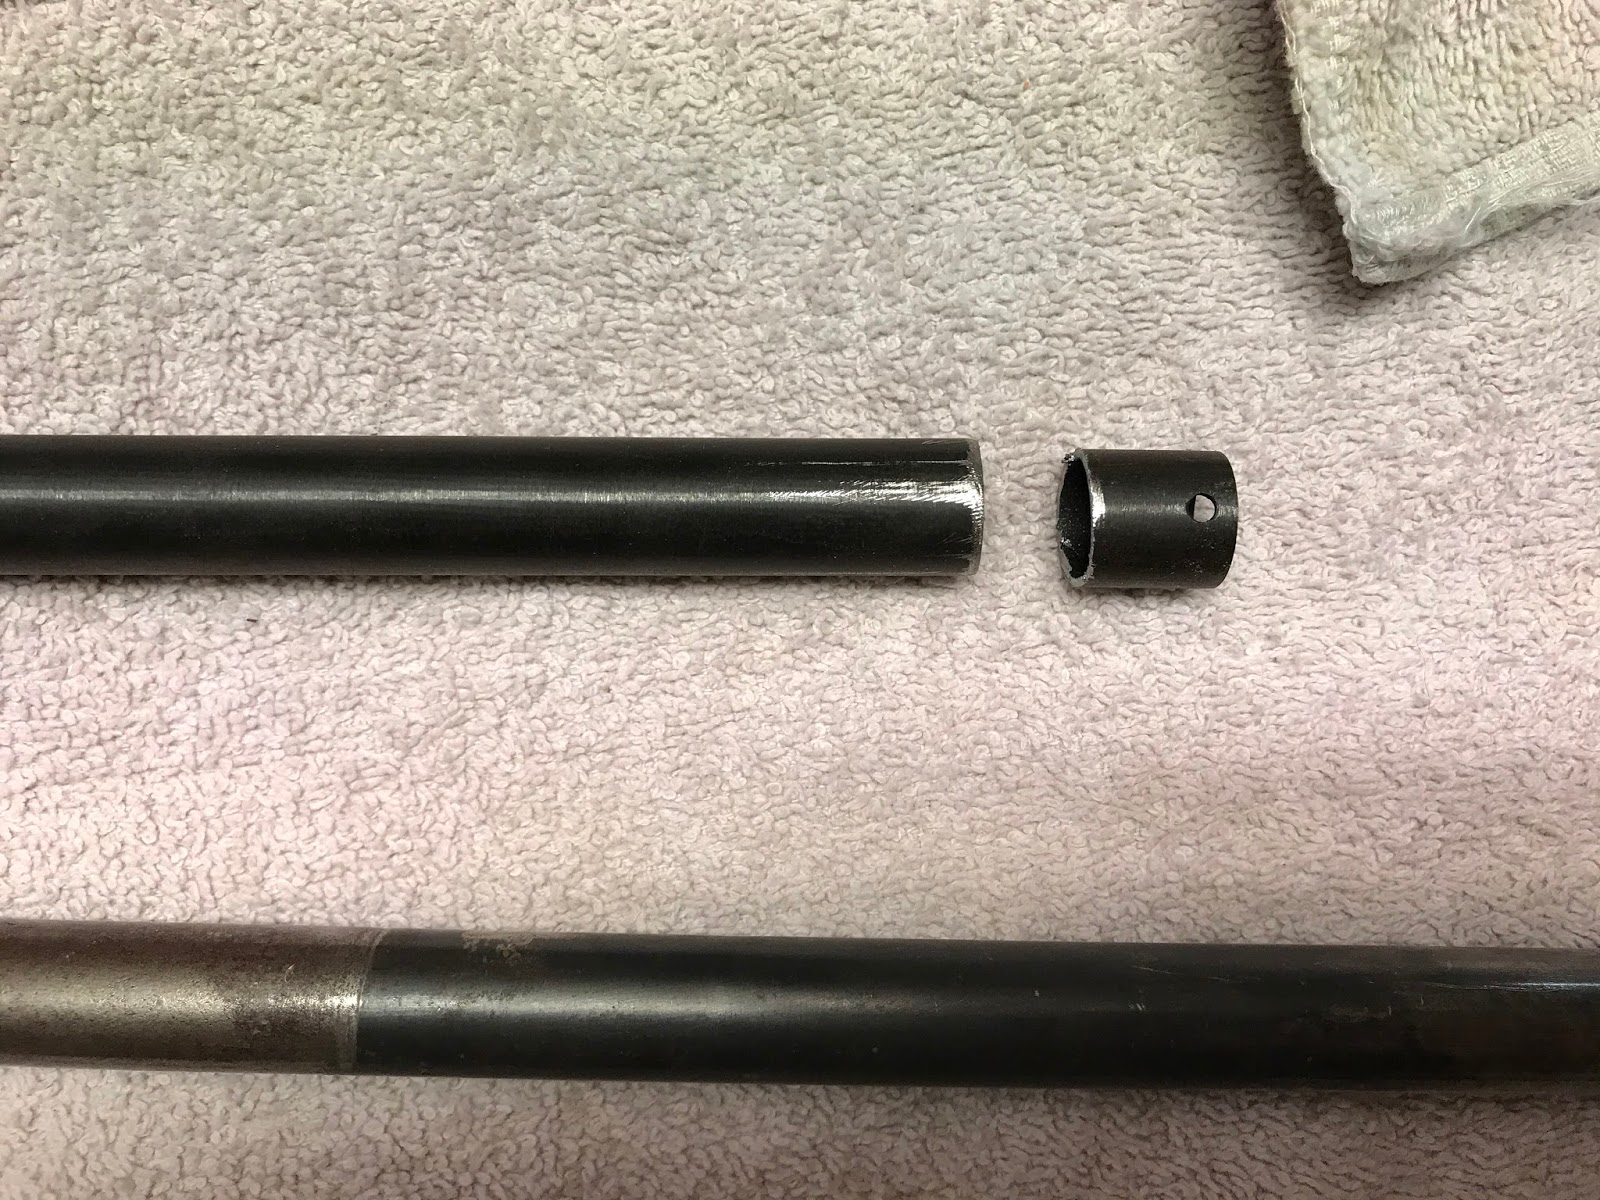
It is a far cry better than the original one.
